.png?width=200&height=80&name=Classic%20Experience%20(1).png)
Note: Single Sign-On is only available on our Enterprise plans. Users with System permission can set up or manage Single Sing-On settings.
Cascade uses SAML 2.0 to securely authenticate and allow users to log in using Google credentials.
This guide is specific to Google GSuite and assumes you already have an understanding of how our SSO solution works. If you're looking for a different SSO provider than Google GSuite or want to read our main SSO guide, click here.
Assumptions
The setup guide assumes the user’s username in Cascade and in Google are the same. Please contact support if this is not the case.
Setup
-
From Google’s admin console (admin.google.com), Click “Apps” > “SAML Apps”.
-
Select the “Add a service/App to your domain” link or click the plus (+) icon in the bottom corner.
-
Click “Setup my own custom SAML App”, The Google IDP Information window opens and the Single Sign-On URL and the Entity ID URL fields automatically populate.
-
From “Option 2” Click the “DOWNLOAD” button next to “IDP metadata”. Use this metadata to setup Google as the SSO provider in Cascade as shown in 'Setting up Single Sign-On provider on Cascade' section.
-
Click “Next”
-
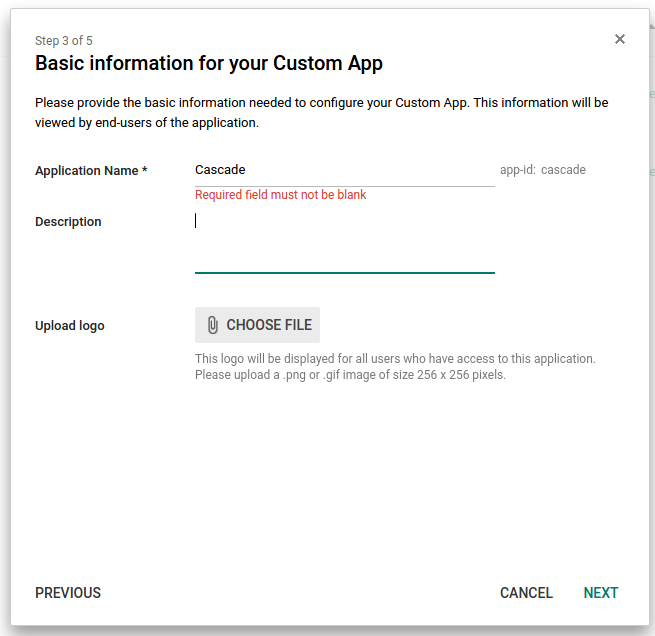
For “Application Name”: Cascade
-
“Upload Logo”: You can use the logo Cascade Logo
-
Click “Next”
-
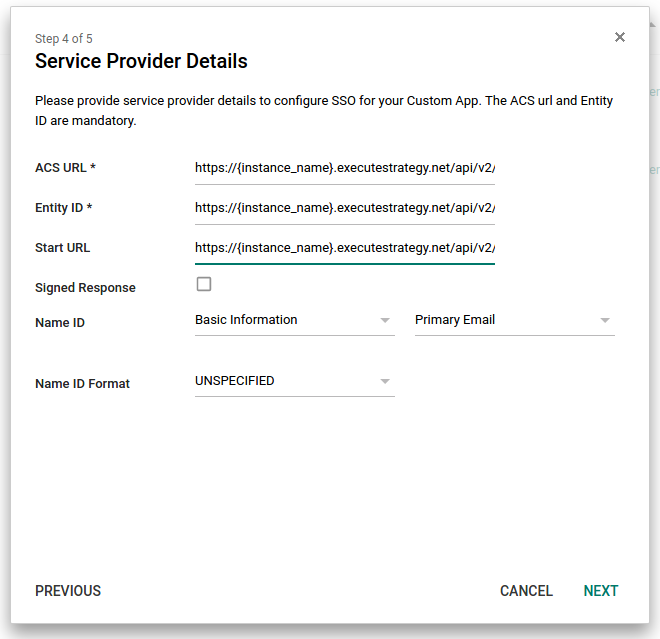
“ACS URL”: https://{instance_name}.executestrategy.net/api/v2/identity_providers/1/login. Replace {instance_name} with your instance name.
-
“Entity ID”: https://{instance_name}.executestrategy.net/api/v2/identity_providers/1/metadata. Replace {instance_name} with your instance name.
-
“Start URL”: https://{instance_name}.executestrategy.net/api/v2/identity_providers/1/login. Replace {instance_name} with your instance name.
-
"Name ID Format": most likely needs to be "Email"
-
Leave the rest of the settings as is.
-
Click “Next”
-
Click “Finish”