.png?width=200&height=80&name=Classic%20Experience%20(1).png)
ⓘ Single Sign-on is available on only our Enterprise plans.
Users with System privilege can set up or manage Single Sign-On settings.
Cascade uses SAML 2.0 to securely authenticate and allow users to log in using Azure.
This guide is specific to Azure. It assumes you already have an understanding of how our SSO solution works. If you're looking for a different SSO provider, see our main SSO guide.
Before you start
Before you use Azure for SSO, there are a few things you'll need:
☑ An active Cascade account with 'System' permissions
☑ An Active Azure AD Premium subscription (Required to configure federated single sign-on for a non-gallery application)
☑ One of the following roles in Azure AD:
- Global, Cloud Application, or Application administrator
- Owner of the service principal
How to set up Azure SSO:
-
Register Cascade as a non-gallery application through the Azure portal
-
Use the configuration options from Azure to register Azure as an identity provider in Cascade
-
Download metadata from Cascade and update the SAML configuration within Azure
-
Assign individuals and groups in Users and groups tab in the new Azure non-gallery application
Step 1: Register Cascade in Azure
-
On the Azure portal, navigate to Enterprise Applications > All Applications.
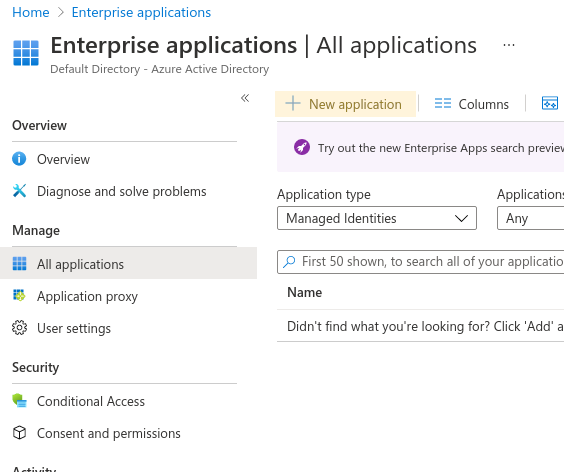
-
Select New Application at the top of the page. Then select Create your own application.
-
In the Create your own application tab, enter
Cascade. Select the option Non-gallery, as shown below.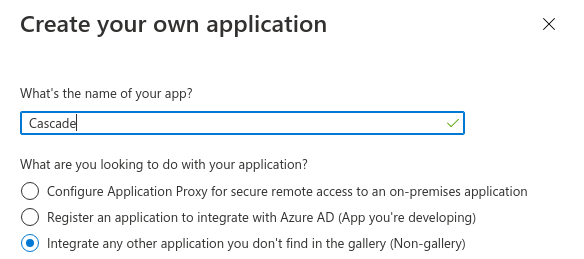
-
At the bottom of the panel, select Create.
If you see a "Not Found" page after you select Create, refresh your browser. -
In the newly created application, navigate to the Single sign-on configuration page. Select the single sign-on method -
SAML.
-
Edit the Basic SAML Configuration. To be able to download the
Federation Metadata XMLfile, you will need to enter the following placeholder text for the following fields:-
Identifier (Entity ID): PlaceholderText
-
Reply URL: https://www.google.com
Later we will overwrite this text with information from your Cascade instance.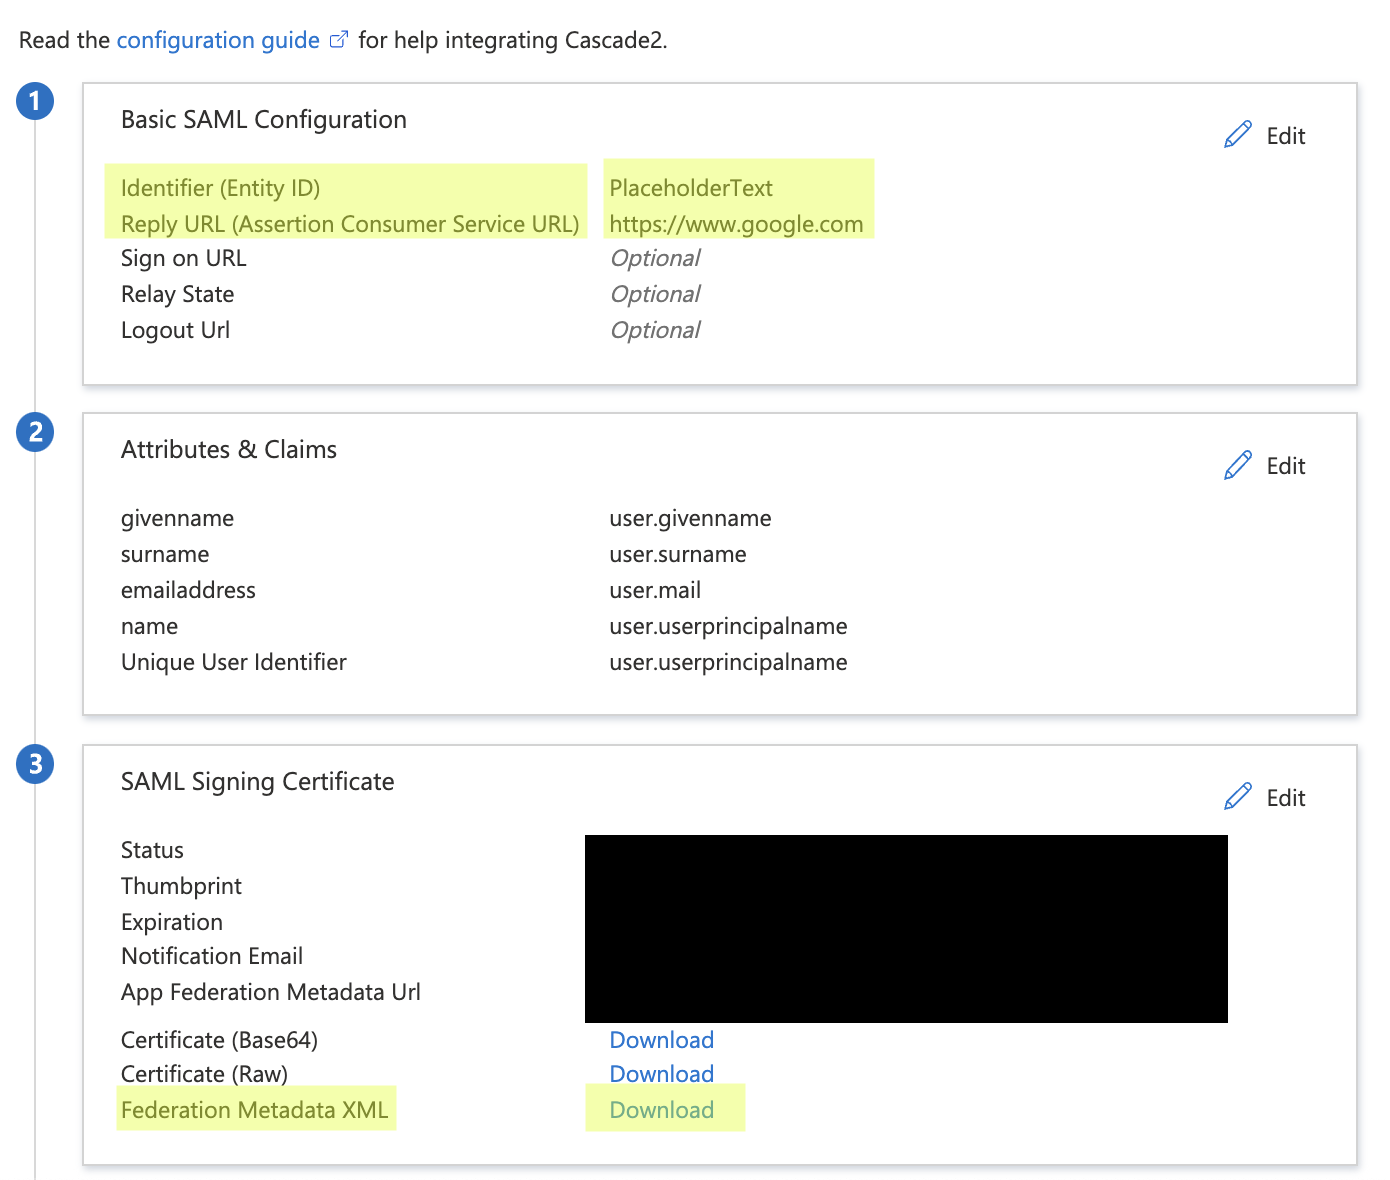
-
-
Download the
Federation Metadata XMLfile. To do so, select the associated Download link within the SAML Signing Certificate section.
Step 2: Register Azure as an identity provider in Cascade
-
Open Cascade.
-
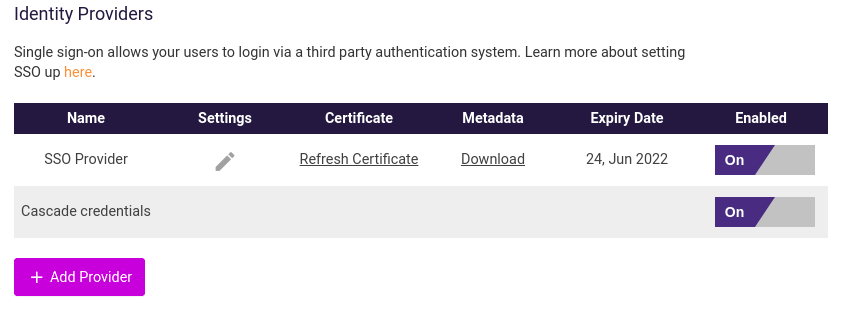
In the bottom left corner, select your initials, then System, then the Security tab.
-
Select Add Provider. A pop-up window appears.
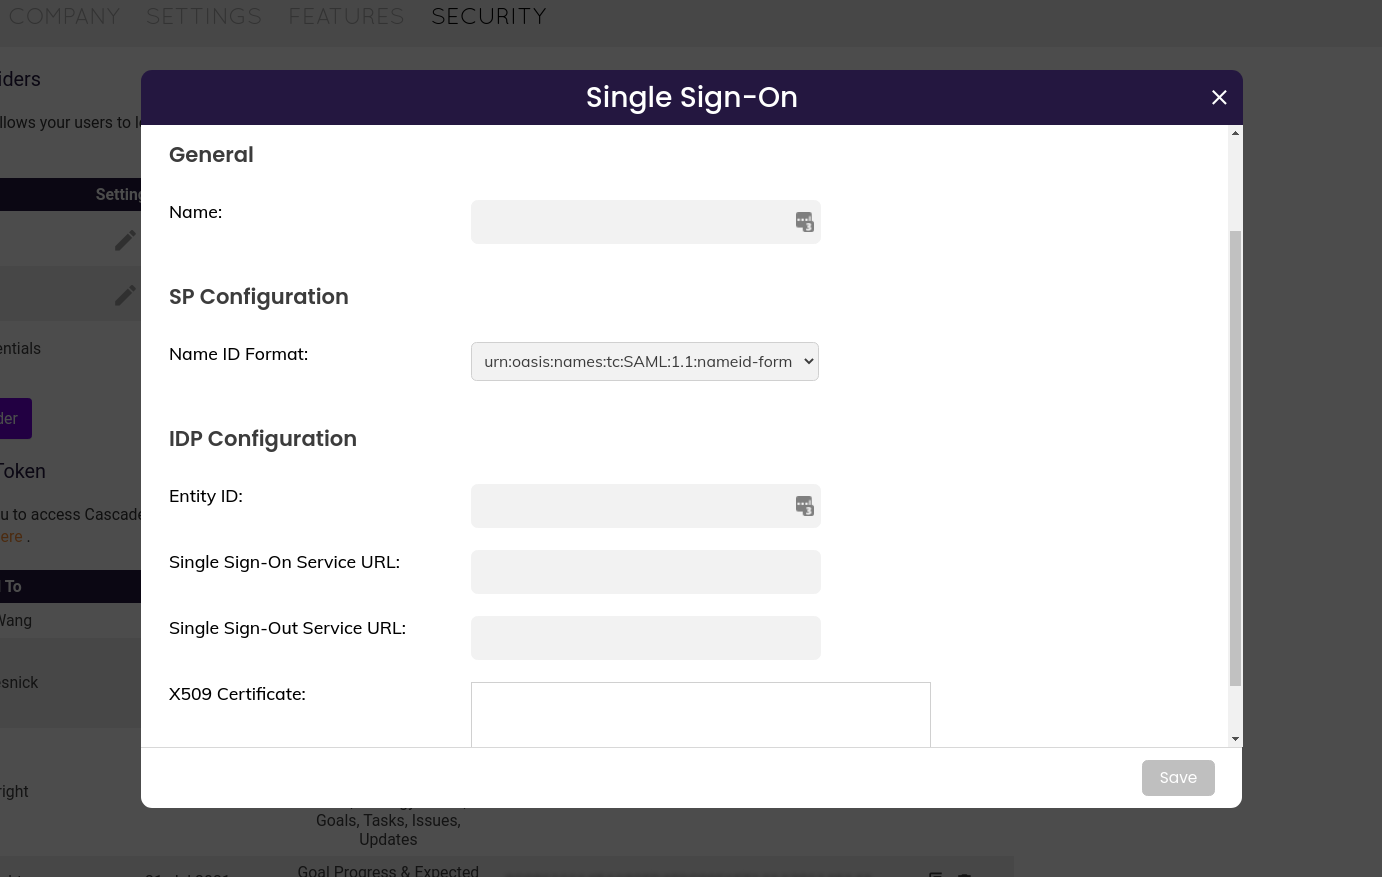
-
For "Name", enter the name you want users to see when they sign in. It will be shown as "Login with {Name}"
-
For "Name ID Format", select "urn:oasis:names:tc:SAML:1.1:nameid-format:emailAddress"
-
This is the most common option, however, this may be subject to change depending on your account setup.
-
-
For the remaining four fields, there are two ways of sourcing the required information:
-
Azure-provided values
-
Federation Metadata XML file
-
A. Azure Provided Values
-
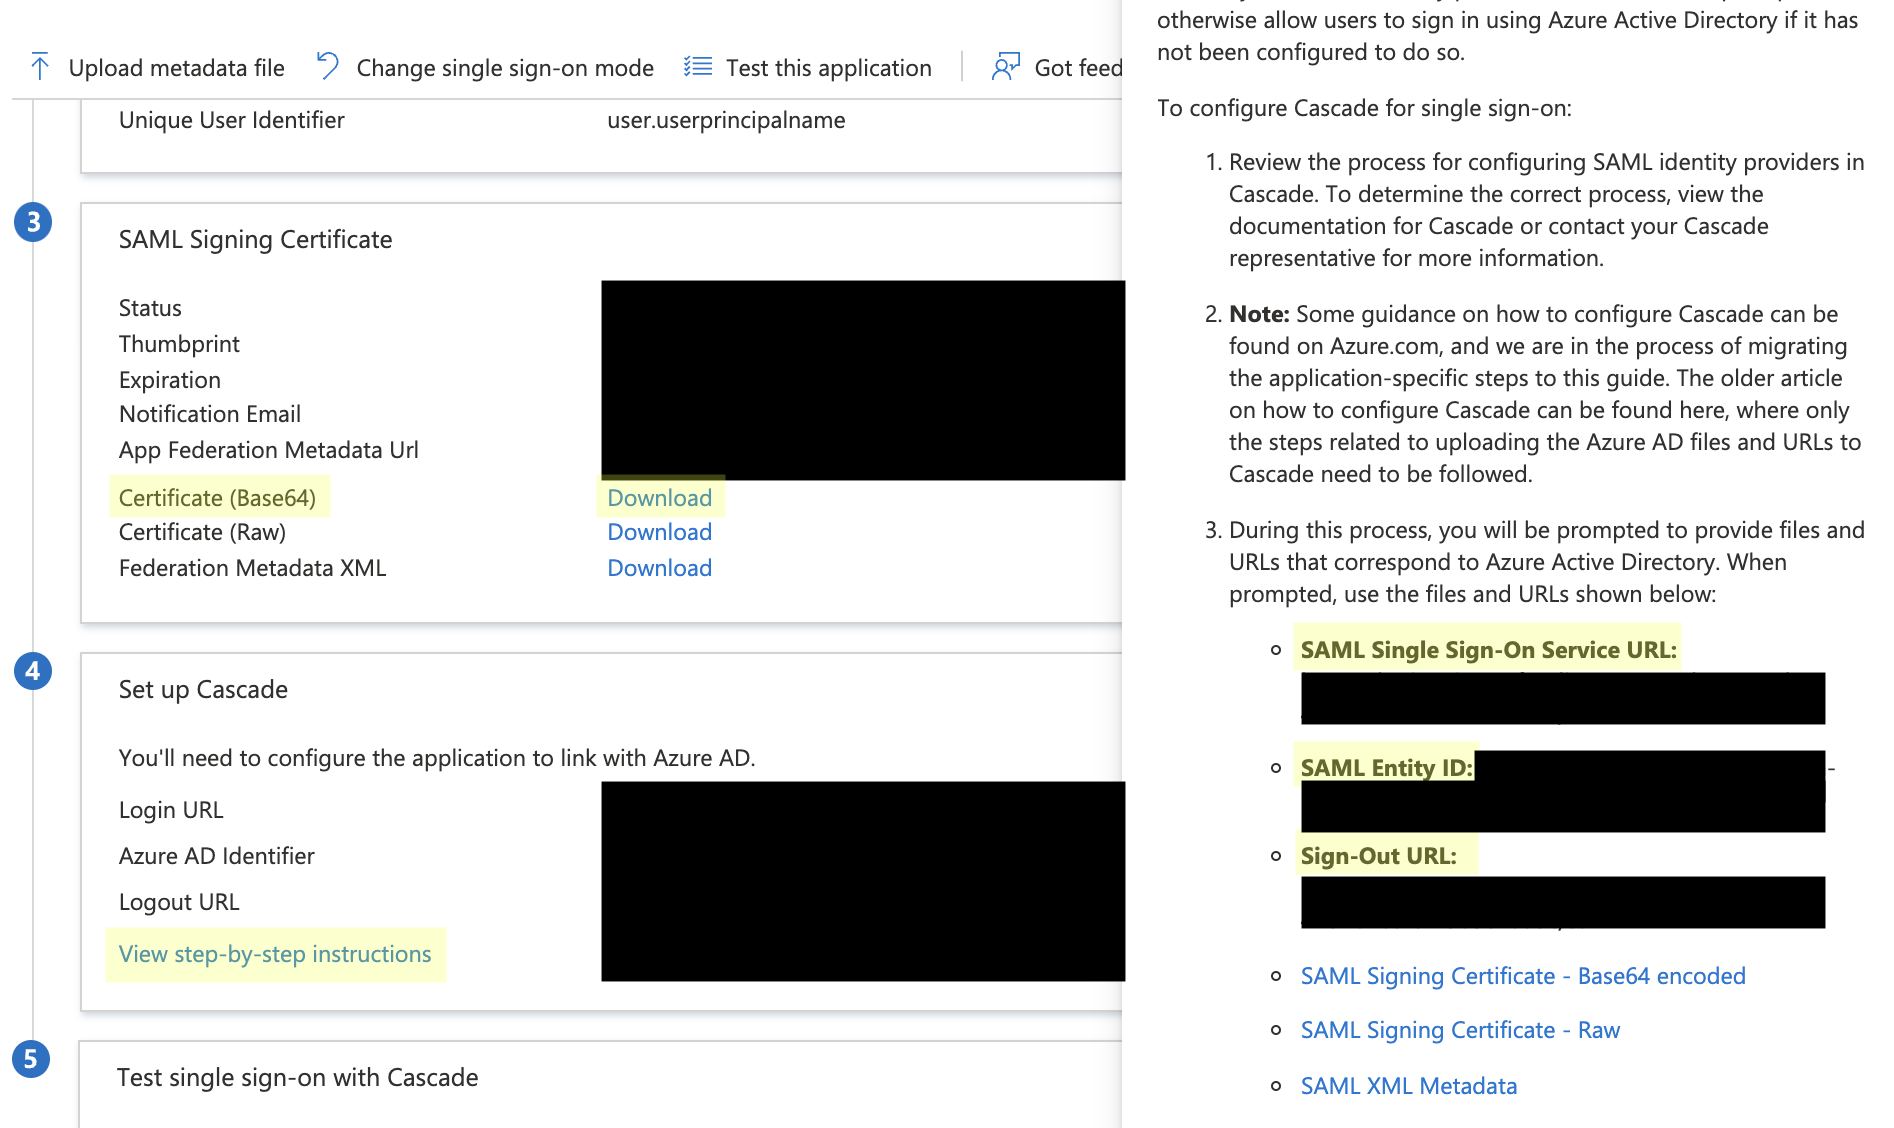
In your Azure Single sign-on SAML configuration, go down to 4 - Set up Cascade.
-
Select View step-by-step instruction.
At the bottom of the sidebar that pops up, you will see the values you need to set up the SSO in Cascade. You will copy and paste these over to the correlated fields in Cascade. -
To get the X509 Certificate value, open the downloaded
Federation Metadata XMLFile, or download theCertificate (Base64)and open the file in a text editor or notepad. Make sure not to copy over any extra" " > < =characters
B. Federation Metadata XML File
-
Open the XML file in an internet browser. Search for
entityID. This will be a URL starting withhttps://. Copy and paste everything from the first quote to the final forward slash and end quote, as shown here:
-
Next, scroll to the bottom of the Azure file and locate the
SingleLogoutServiceandSingleSignOnServiceURLs. Paste them into the respective fields in Cascade -
Finally, locate
X509Certificate. Copy and paste this data into Cascade.
ⓘ Note: be sure to remove any spaces, quotation marks or
< >characters:

-
After you fill these fields in Cascade, select Save.
Step 3: Download metadata from Cascade and update the SAML configuration within Azure
Once Cascade registers Azure as an Identity Provider (IdP), download the federation metadata generated by Cascade.
-
To do so, find the Metadata column and select Download.
-
In the Azure Single sign-on page, update the SAML configuration for the application. Upload the federation metadata XML file generated by Cascade. The placeholder text entered earlier will be overwritten.

-
Edit the Attributes & Claims section. Ensure that the value that is mapped against the Name ID claim matches users' usernames within Cascade. No additional claims are required.
-
The Azure default configuration for this shown below is typically correct. However, this may be subject to change depending on your account setup. Try the default configuration initially.
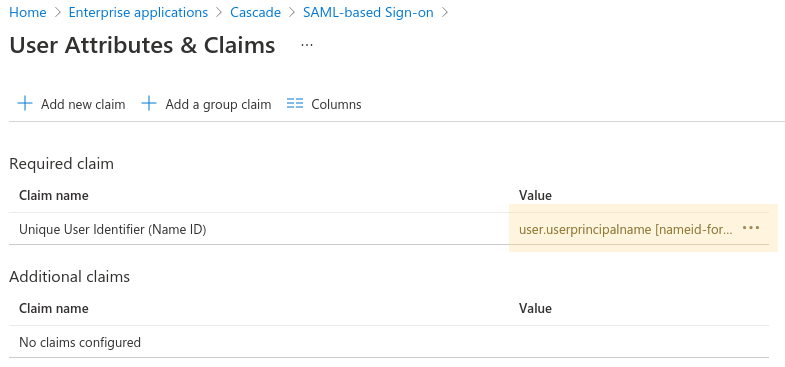
-
-
To test the configuration, at the bottom of the page click on the Test button.
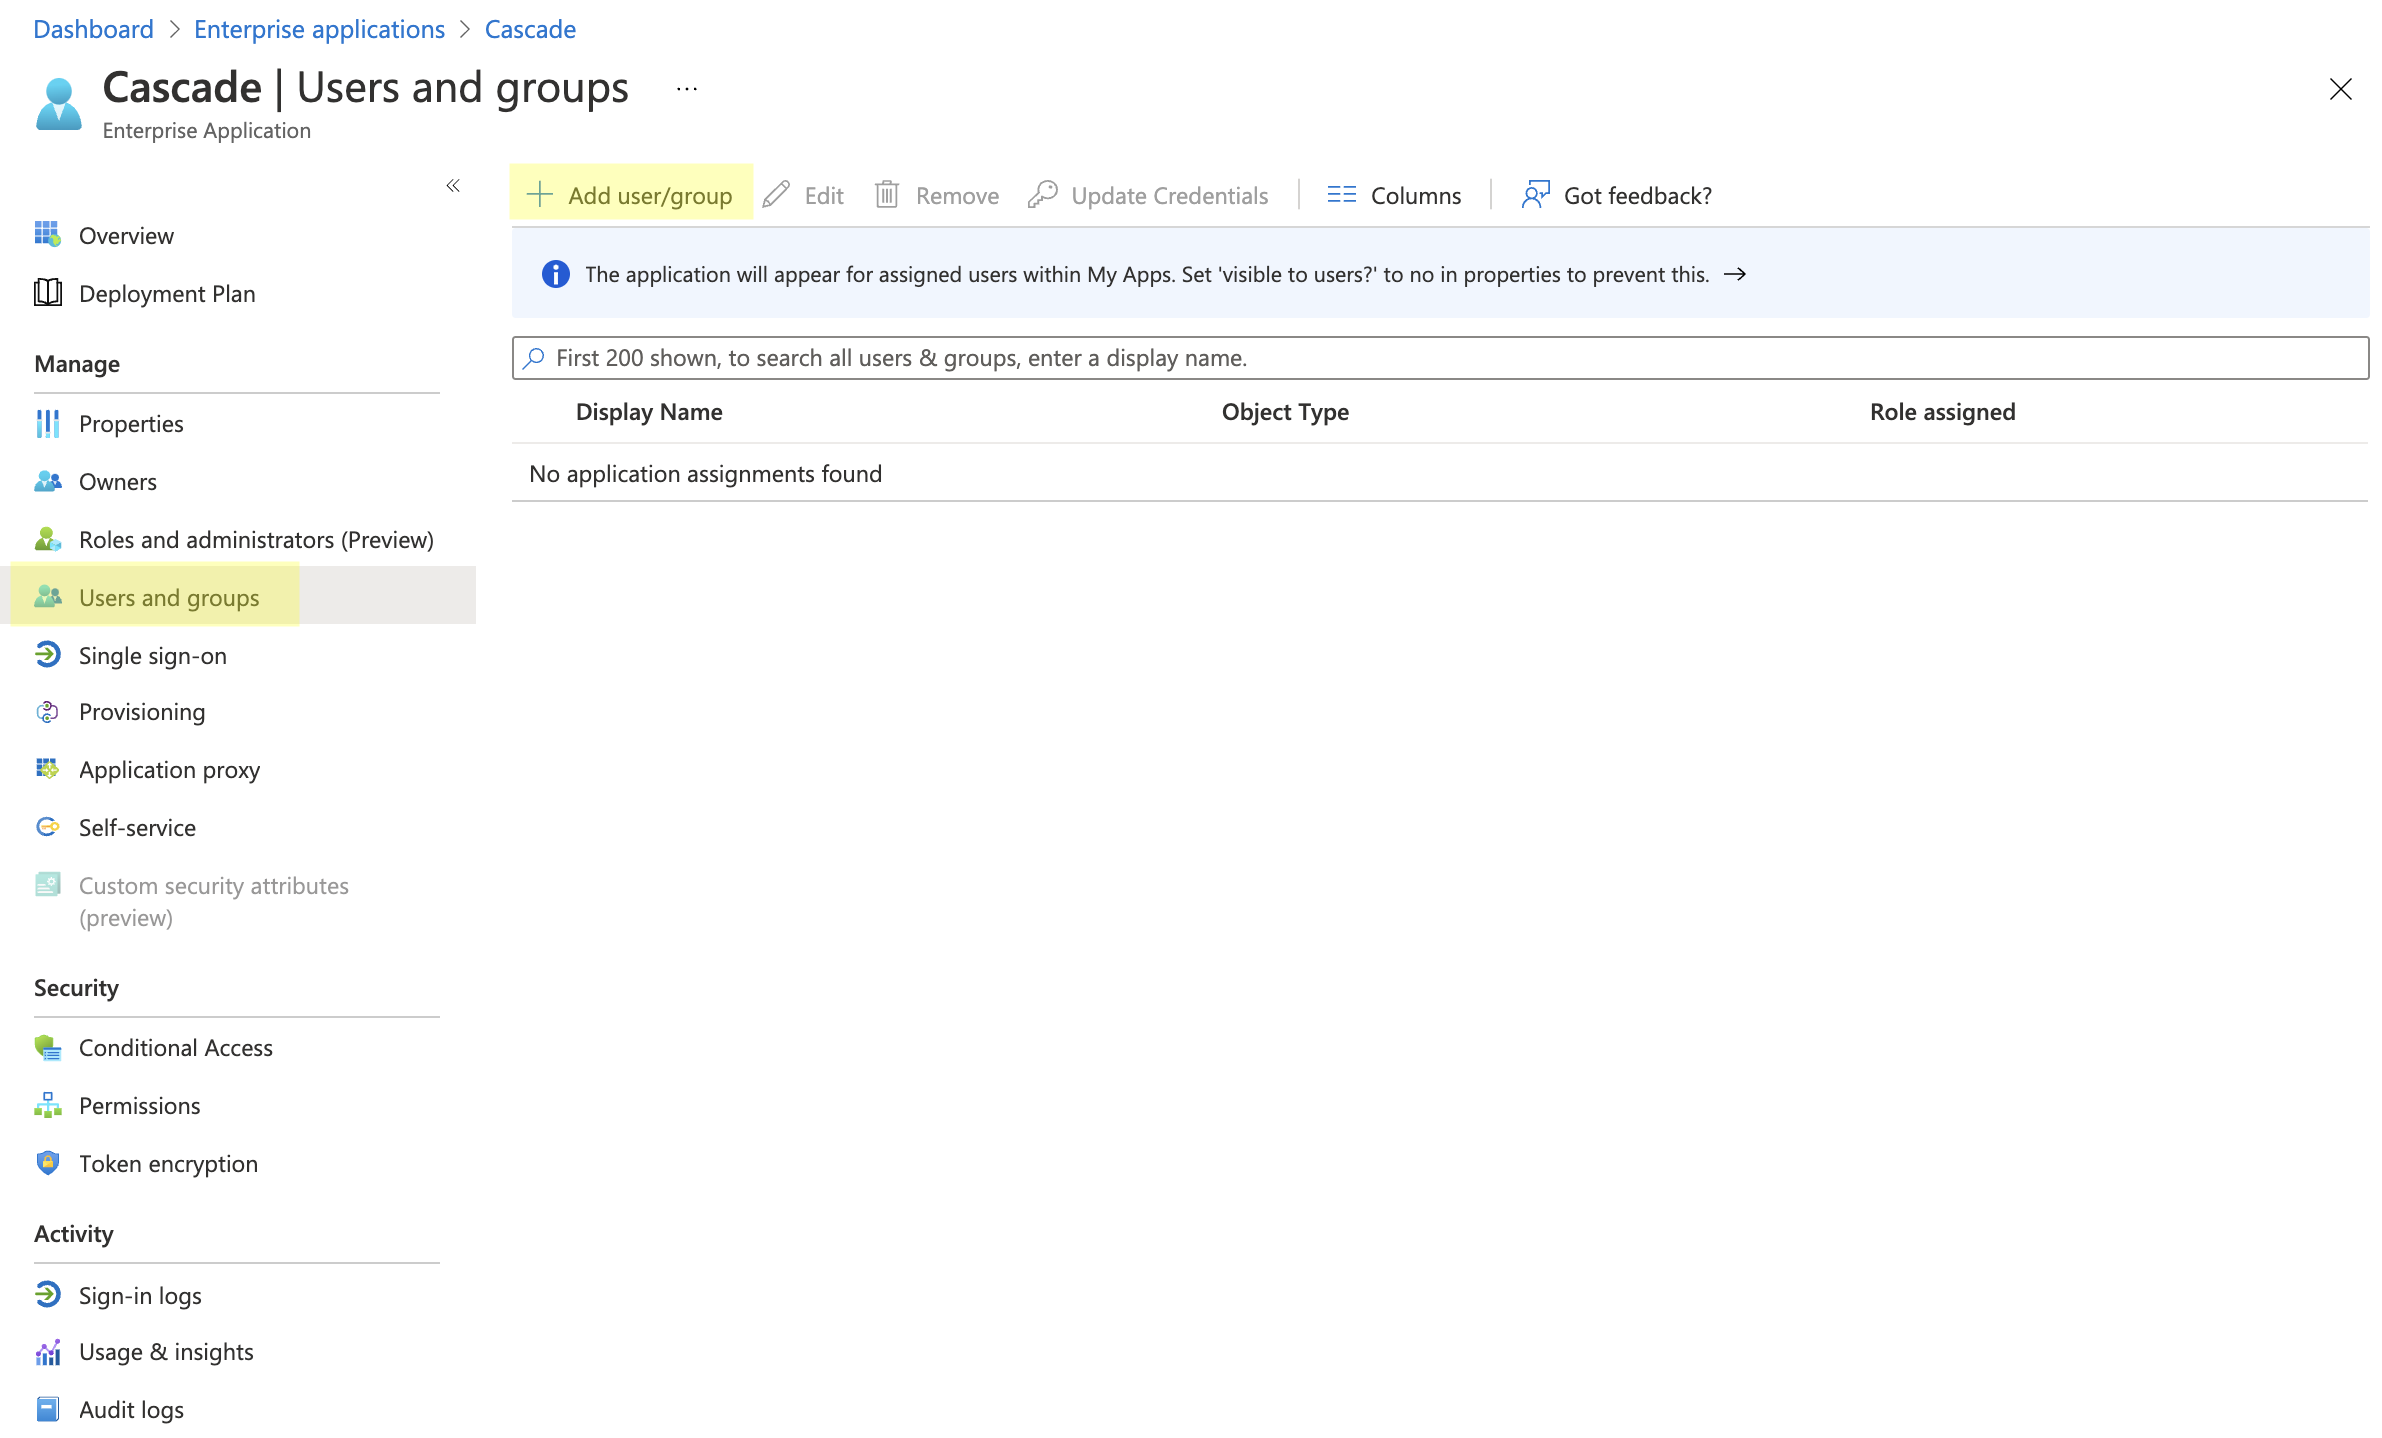
Step 4: Assign individuals/groups in 'Users and groups' tab in the newly created Azure non-gallery application
-
Navigate to the new Cascade application that was set up in Azure by going to Enterprise Applications > Cascade > Users and groups > Add user/group.
-
Under Users, select None selected. Choose the users that are able to use the SSO. Depending on your Azure AD plan level, you will be able to add whole groups of individuals as well.
-
At the bottom of the page, select Assign.
Without giving each user access here, they will not be able to use SSO.
Troubleshooting
If you receive an authorization error from Cascade after trying to authenticate using SSO, check the following:
-
Do the values mapped in the Name ID claim match the Cascade usernames?
Note that username capitalization and format must match. - Step 3.3
-
Do the Signing certificates match?
The certificate set as part of the IDP configuration within Cascade must match the signing certificate defined within the application configuration in Azure. - Step 3.2 -
Do the values copied from Federation Metadata XML have any spaces, quotation marks, tags, or return characters?
If so, remove them.
Further Reading
-
Assign users to the application (Microsoft)
-
Understand SAML-based single sign-on (Microsoft)