Setting up Single Sign-On (SSO)
Note: Single Sign-On is only available on our Enterprise plans. Users with System permission can set up or manage Single Sign-On settings.
Note: Setting up SSO is an account wide setup. Once set up correctly, it will apply to all users in the account.
Cascade supports most of the popular single sign-on solutions:
-
SAML 2.0 (this article)
This article is a general instruction on how to configure SSO that is applicable to generic SAML 2.0 implementation. If you are using one of the providers named above, click on the link for a detailed guide of how to configure for the specific provider.
Setting up Single Sign-On with Cascade
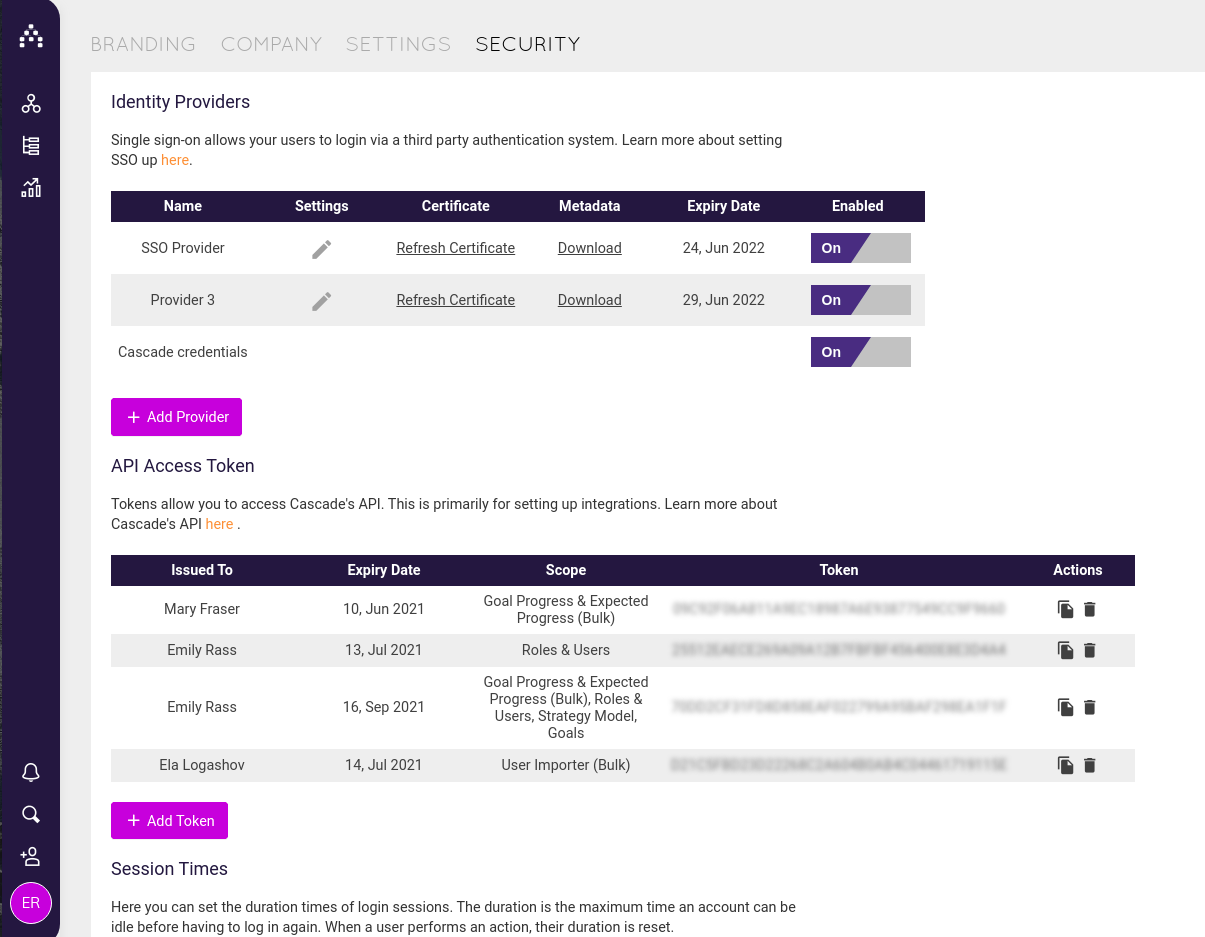
To set up single sign-on in Cascade, go to Profile > System > Security.
Setup Steps
-
Click on "Add Provider".
-
"Name:" The name the users will see when they sign in. It will be shown as "Login with {Name}"
-
"Name ID Format:" Depending on your SSO provider, you can find the type in your provider's metadata file. Tips: The two most common ones are "urn:oasis:names:tc:SAML:1.1:nameid-format:unspecified" and "urn:oasis:names:tc:SAML:1.1:nameid-format:emailAddress"
-
"Entity ID:" Can be found in the metadata file
-
"Single Sign-On Service URL:" Can be found in the metadata file
-
"Single Sign-Out Service URL:" Can be found in the metadata file
-
"X509 Certificate:": Can be found in the metadata file. Make sure the certificate is in the correct format, does not include any spaces or return characters.
-
Click "Save"
-
Download the metadata using the metadata "Download" button from the Security web page.
-
When the set up is complete on the SSO provider side, test the connection and click "Enable".
-
If you need to set up on your identity provider's side first which requires Cascade's metadata, you can create a provider record in Cascade with dummy data, download the metadata first and update the settings afterwards.
Tip: Make sure the usernames between your SSO provider match the usernames in Cascade. Typically, the username will be the work emails. Username capitalization must be matched!
.png?width=200&height=80&name=Classic%20Experience%20(1).png)
