.png?width=200&height=80&name=Classic%20Experience%20(1).png)
Introduction:
For this integration we are going to be using an application called Zapier. Zapier allows us to sets triggers and actions according to what outcomes you need. In this case we will be using Zapier to trigger actions in Cascade from new activity or data retrieved in Accounting Software Xero.
Setting Up Xero:
Follow this guide to create a public/private key pair and register your private application in Xero.
Setting Up the Zap:
A zap is just a stored procedure that performs custom actions based on a trigger. For example our zap will be triggered monthly to update account balance in Cascade using data retrieved from Xero Reports.
Creating the Zap:
Assuming you already have a Zapier account, to create the Zap click the large "MAKE A ZAP" button to the left of your account navigation.
Once you've done this you will be taken to the Zap builder interface:

When you reach this interface screen make sure to name your Zap in the top left corner!
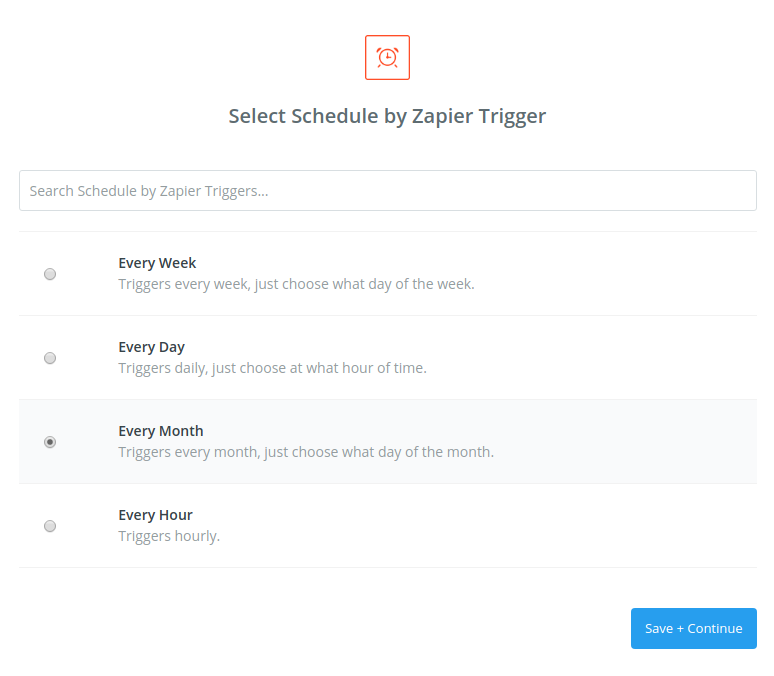
Setting up the Zap Trigger:
For our example we will set a 'Schedule' trigger so that the Zap will automatically be triggered every hour/day/week/month.
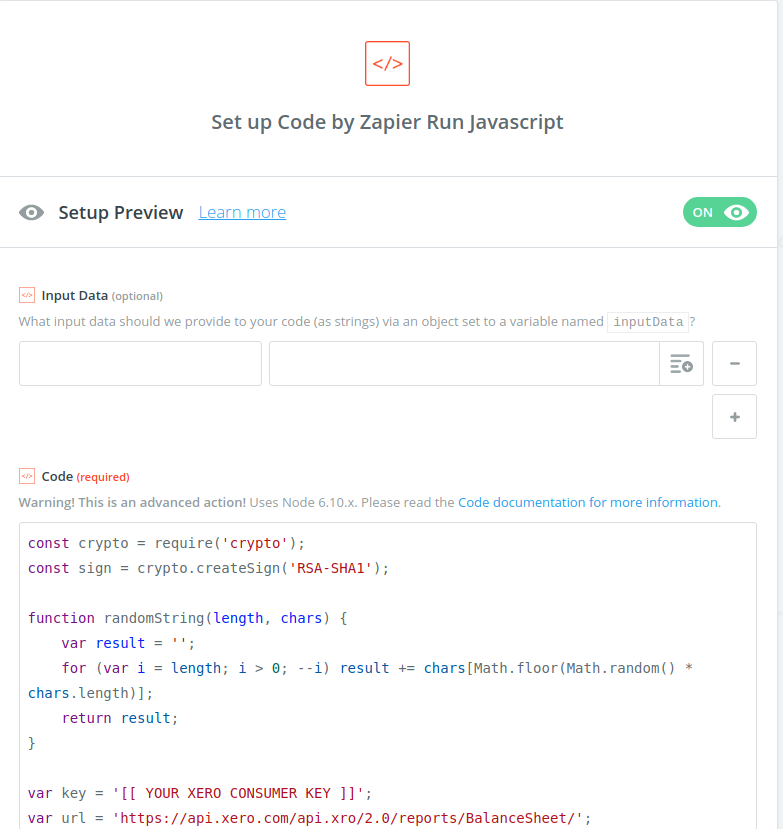
Setting up the Zap Action:
In this step we will get data from Xero Balance Sheet Report via Xero API using Javascript.
Select 'Code' from 'Built-In Apps' for your action app then select 'Run Javascript'. Paste the code below into section 'Code'. You need to replace [[YOUR XERO CONSUMER KEY]] and [[YOUR PRIVATE KEY]] with your Xero App consumer key and the private key downloaded.
const crypto = require('crypto');
const sign = crypto.createSign('RSA-SHA1');

function randomString(length, chars) {
    var result = '';
    for (var i = length; i > 0; --i) result += chars[Math.floor(Math.random() * chars.length)];
    return result;
}

var key = '[[ YOUR XERO CONSUMER KEY ]]';
var url = 'https://api.xero.com/api.xro/2.0/reports/BalanceSheet/';
var nonce = randomString(32, '0123456789abcdefghijklmnopqrstuvwxyz');
var timestamp = Math.floor(Date.now()/1000);

const private_key = '-----BEGIN PRIVATE KEY-----\n' +
'[[ YOUR PRIVATE KEY ]]' +
'-----END PRIVATE KEY-----';

var signString = 'GET&' + encodeURIComponent(url) + '&' + encodeURIComponent('oauth_consumer_key=' + key + '&oauth_nonce=' + nonce + '&oauth_signature_method=RSA-SHA1' + '&oauth_timestamp=' + timestamp + '&oauth_token=' + key + '&oauth_version=1.0');

var args = 'oauth_version=1.0' + '&oauth_nonce=' + nonce + '&oauth_timestamp=' + timestamp + '&oauth_consumer_key=' + key + '&oauth_token=' + key + '&oauth_signature_method=RSA-SHA1';

sign.write(signString);
sign.end();

var signature = sign.sign(private_key, 'base64').toString();

var mainRequest = url + '?' + args + '&oauth_signature=' + encodeURIComponent(signature);

console.log('signString',signString);
console.log('mainRequest',mainRequest);

fetch(mainRequest, {
   headers: {
      'Accept': 'application/json'
    },
    method: 'GET'})
.then(function(res) {
  return res.json();
})
.then(function(output) {
  callback(null, {a: output});
})
.catch(callback);
Your configuration should look like this:
Then if you click on 'Continue' and test this step, you should be able to see all data retrieved from Xero Balance Sheet report and from there you can get the data you need. Note that depends on the type of the report, the data retrieved from Xero might require formatting, in some cases you might need to add an extra Code step to transform and extract the data you need.
You can use the code provided to make any API calls to Xero by changing the url in the code ('https://api.xero.com/api.xro/2.0/Reports/BalanceSheet'). Read more here.
In your last action step, select 'Cascade Strategy' and from there transfer the data in Xero into Cascade.