.png?width=200&height=80&name=Classic%20Experience%20(1).png)
Manually updating data is tedious and error-prone.
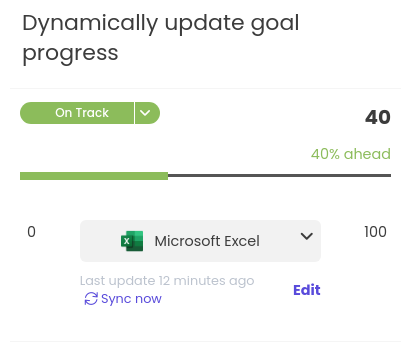
Instead of entering data manually, link your Cascade goals to a spreadsheet and let Cascade update your goal progress for you — dynamically and automatically.
Every time the value in Excel changes, your goal progress will change too. This makes it easy for your team to see the goal's latest status. And everyone will have more time for the interesting work.
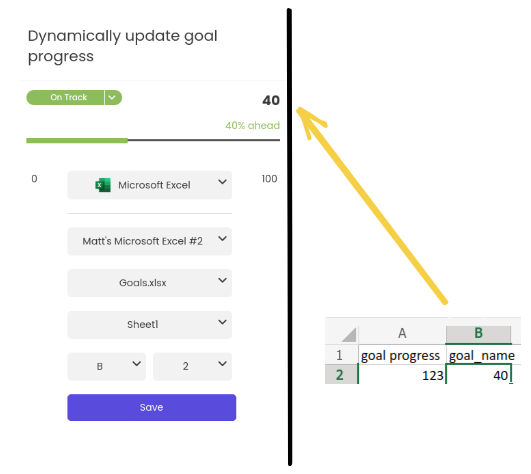
The value of cell `B2` creates the goal's progress score.
Before you start
Before you integrate with Excel, there are a few things you'll need:
☑ A goal in your Cascade instance that you want to link to your spreadsheet
☑ A Microsoft 365 business account
☑ An .xlsx spreadsheet hosted on your OneDrive or on a SharePoint site that you have access to, with goal-progress values and easily-identifiable column titles. Something like this:
ⓘ Use Manual tracking for goal-progress values over 100.
With automatic tracking, Cascade auto-completes goals that have progress scores of 100 or over.
How to integrate Excel with Cascade
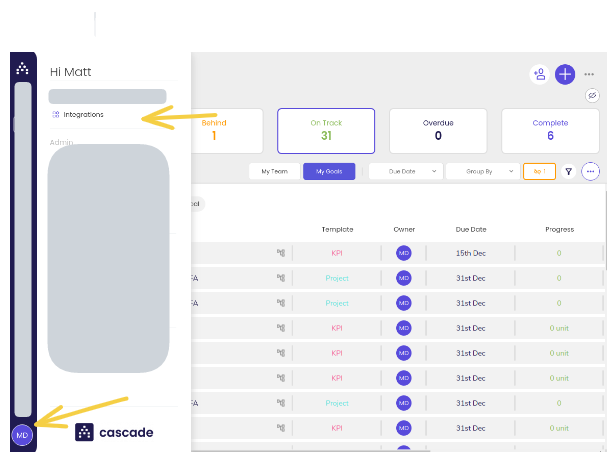
For all Cascade integrations, start by selecting your profile icon. Then go to Integrations
1. Link Excel to your Cascade account
-
In the Cascade sidebar, select your profile.
-
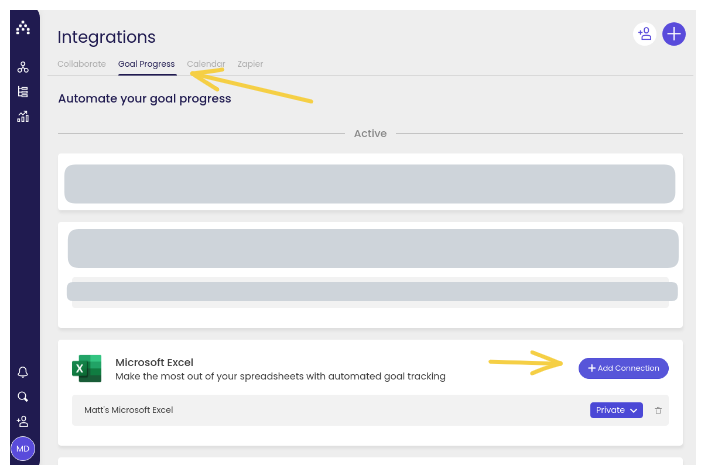
Select Integrations, then select the Goal Progress tab.
-
Find Excel, then select + Add Connection. A pop-up window appears.
-
Give your connection a good name, and choose whether it will be private or shared.
ⓘ A private connection can be used by only the person who created it.
Public connections can be used by anyone in the instance.
A new window will open. Follow Microsoft Office's instructions to connect your Excel account. When you've finished, a success message appears.
You've successfully integrated Excel! Now it's time to link a cell to a goal's progress.
2. Link a cell to your goal progress
-
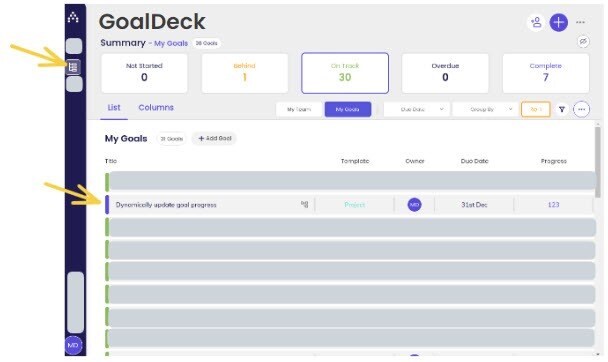
Navigate to a goal that you want to integrate with, then select it.
-
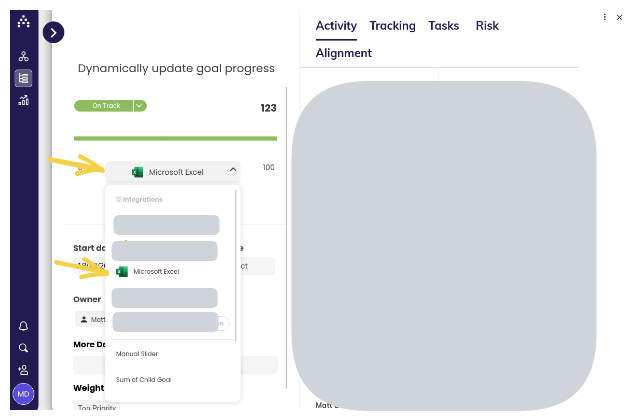
Beneath the goal's progress bar, select the dropdown menu. Under Integrations, select Microsoft Excel.
-
Use the dropdown menus to select the Excel file that you want to link.
-
Filter down to the file's correct sheet, column, and row.
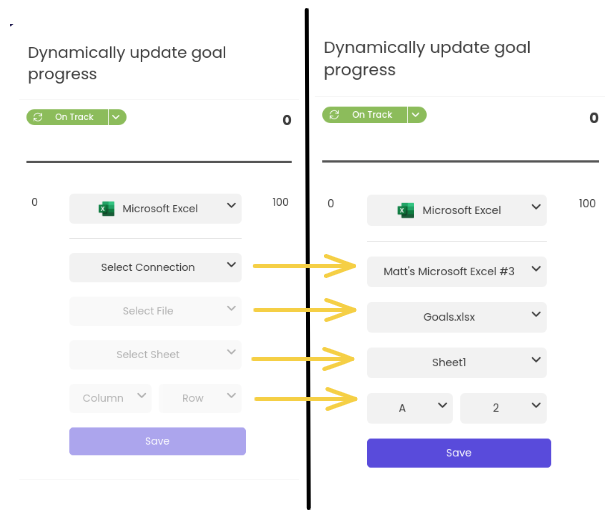
The values in the dropdowns depend on the specific values in the spreadsheet.
-
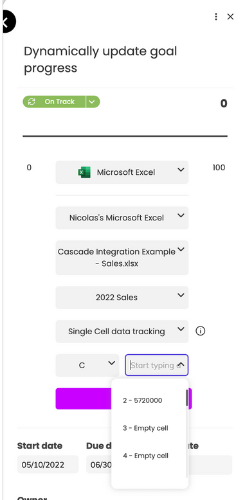
Select a tracking method:
-
Single Cell data tracking: If you select this option, then you need to select a column and the respective row to pinpoint to a particular cell. Any value within this cell will be picked up, and displayed as your goal's current progress!
-
A great use-case for this integration is when you do not have any historical data to include within a goal. This integration also works great if you have an Excel calculation that you want to display as the current progress of a goal (i.e. an average or cumulative value).
-
-
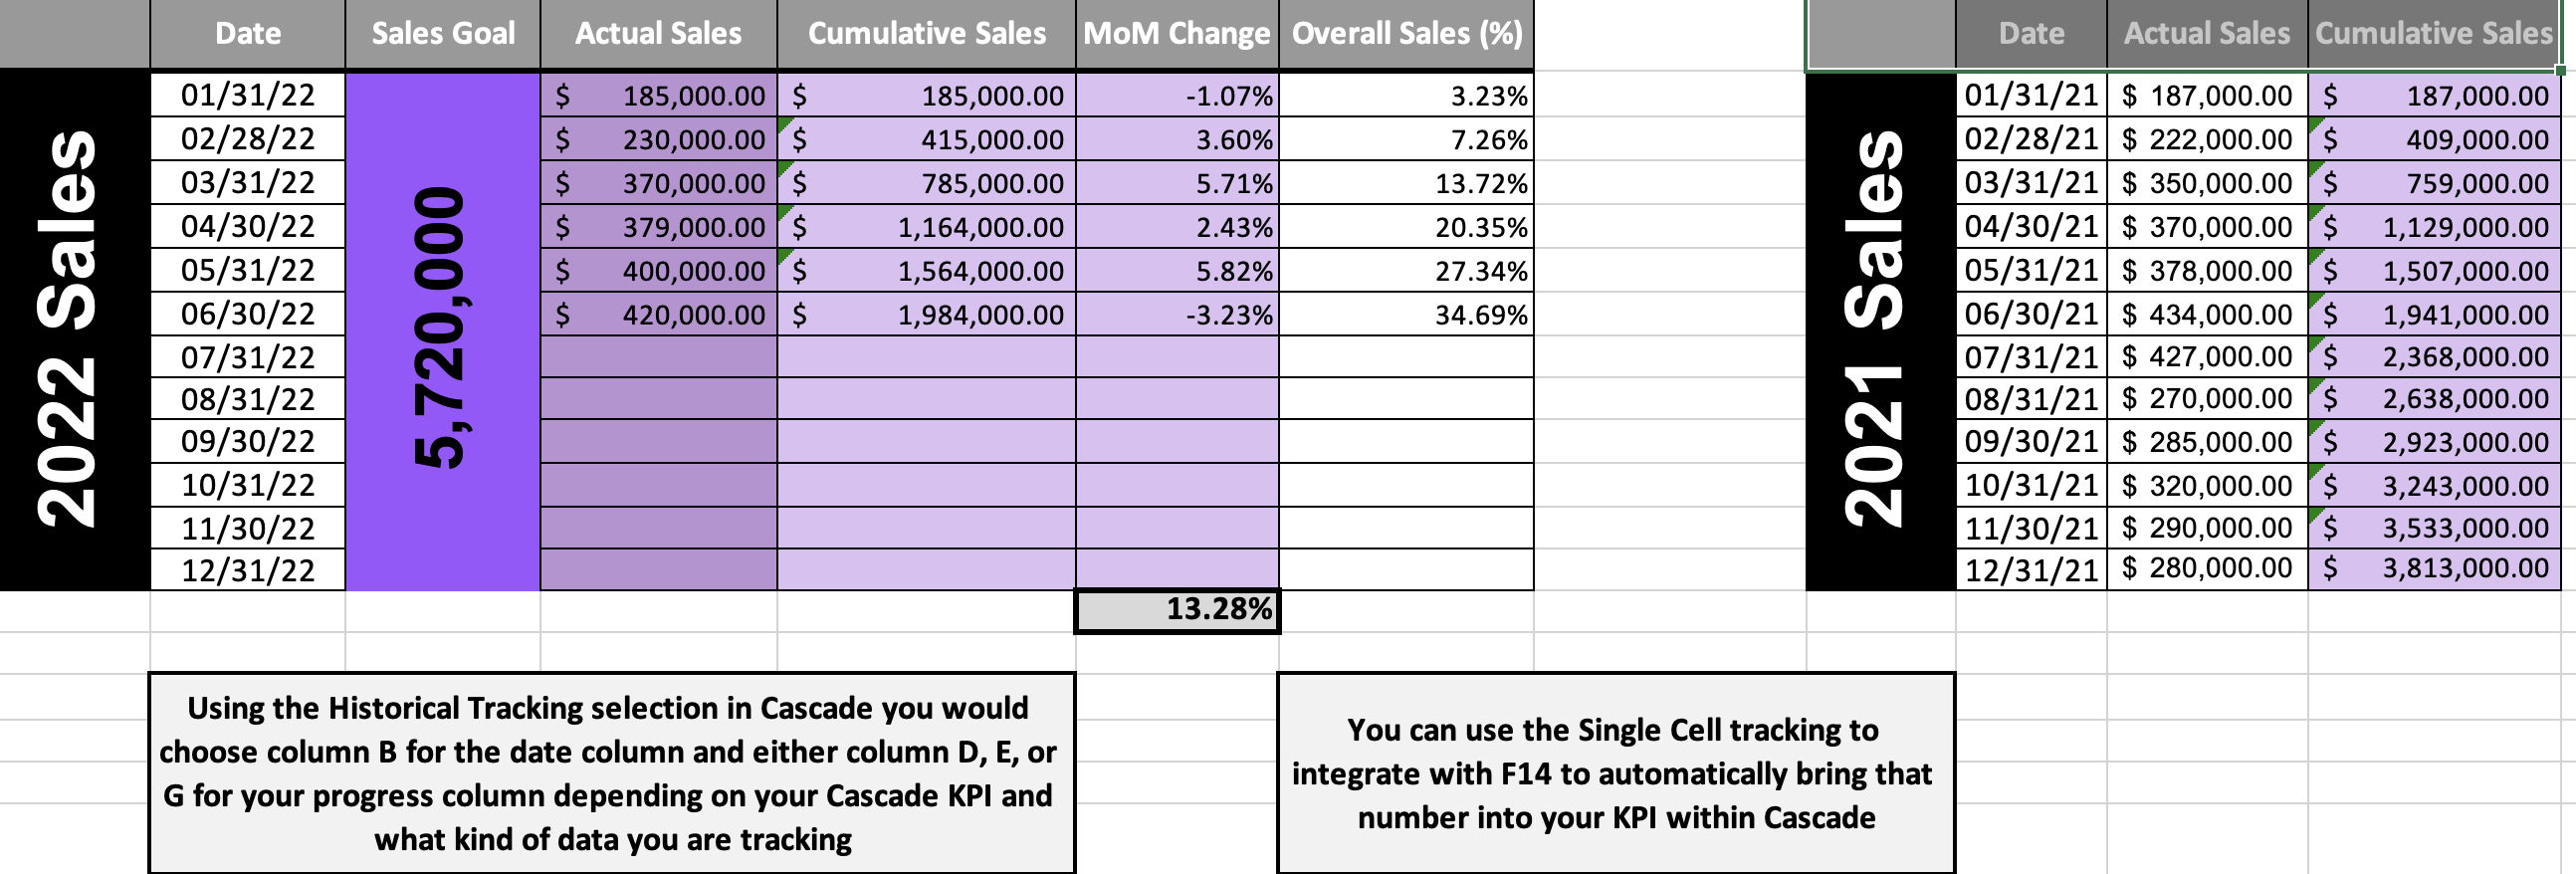
Historical data tracking: If you select this option, you must have a column of values, and a column of dates to be associated with those values. Each one of the values will be automatically mapped out on the goal's tracking map once the integration is connected.
-
The last value that the integration picks up on will be assigned as the goal's current progress. All previous data points will be added to the goal's tracking map as a historical data point associated with the date that is in the same row as the value.
-
The structure of the Excel spreadsheet must be in a specific layout to use this integration:
-
Both the date column and value column must be in a vertical layout where there is a new date and value for each row within the same column.
-
The value that is brought into the goal will be associated with the date found in the same row as the value.
-
-
Dates must be listed in chronological order with the earliest date above the latest dates within the sheet.
-
Only historical data points (data points in the past) will be added to the tracking map. No points in the future will be added.
-
If you try to use this integration with a date/value pair that is in the future, the value will be assigned as the goal's current progress. All values in the future will be plotted with the present date on the tracking map.
-
-
-
You are able to use the same date column for any amount of goals that all have different value columns.
-
The date format must be either:
-
MM/DD/YYYY
-
YYYY-MM-DD
-
-
-
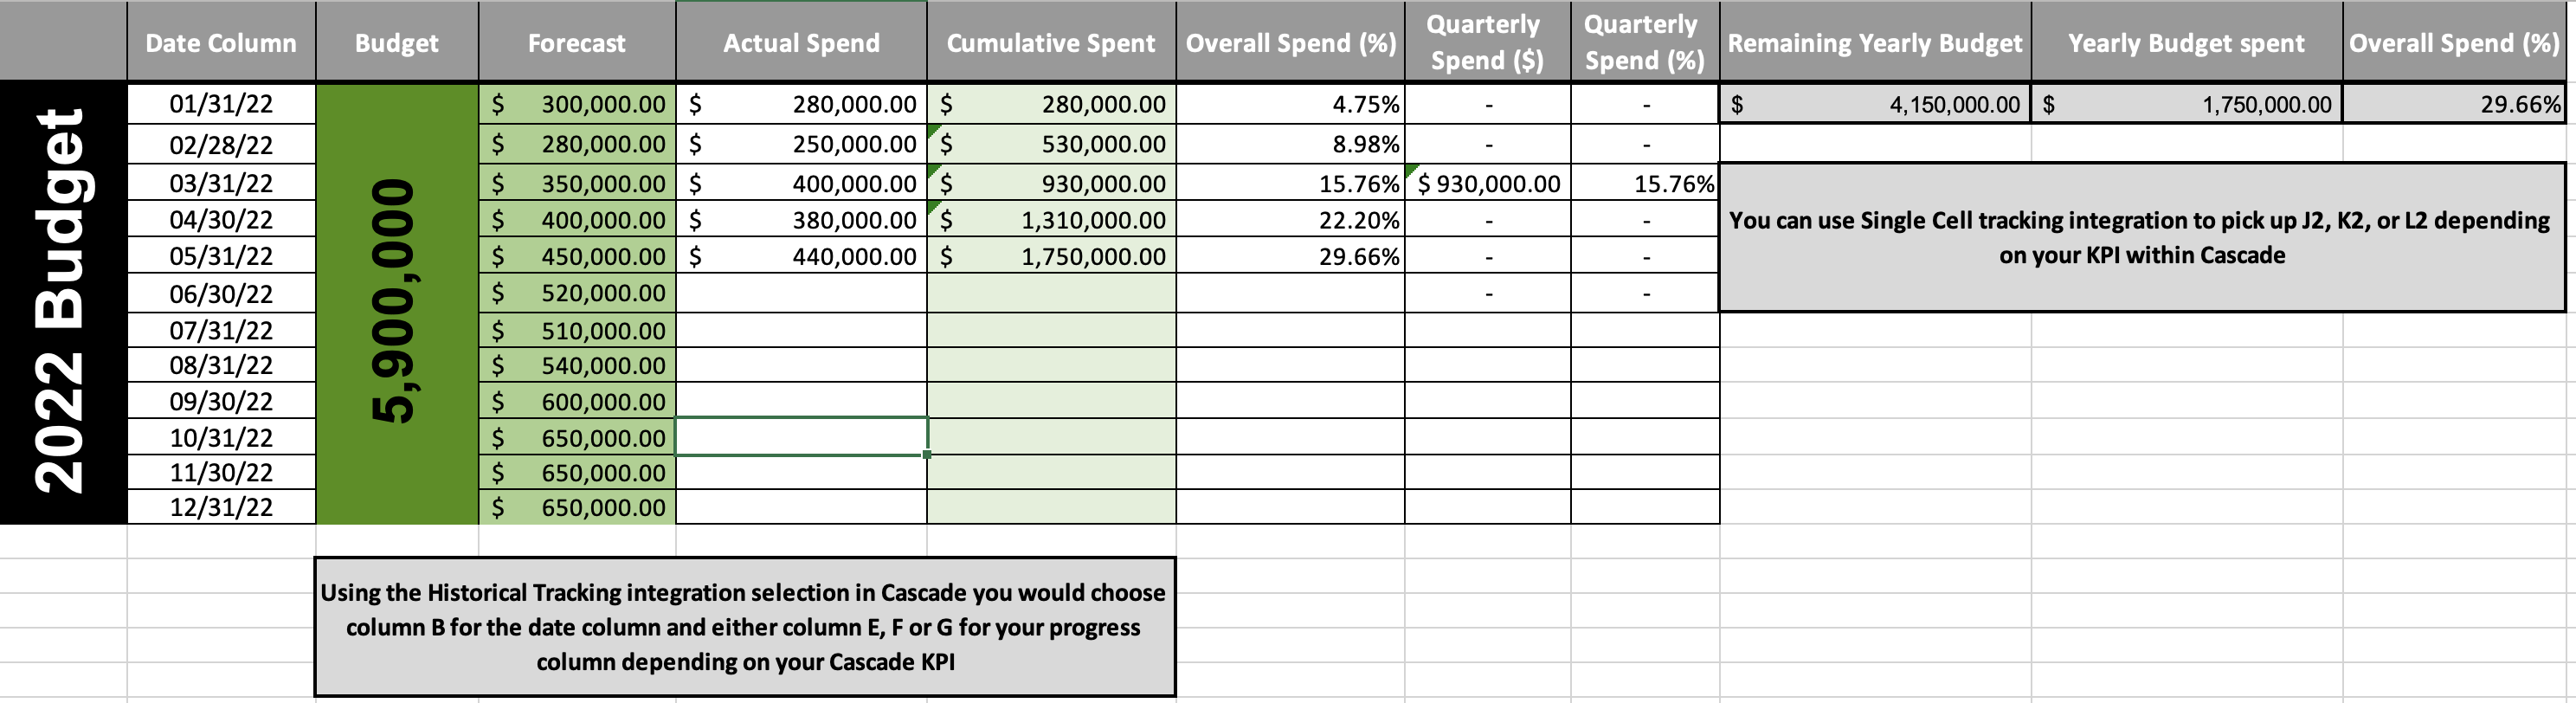
Here are a couple of examples of spreadsheets that formatted correctly for this integration:
3. Click 'Save' and then 'Sync now' to start the integration process.
FAQs
Does data in Cascade affect Excel?
No. The Excel integration is a one-way connection: from Excel to Cascade. Nothing you do in Cascade will change Excel values.
How frequently will my data sync?
When using the Single Cell data tracking, Cascade polls Excel hourly to check for new data. If new data is found, the Cascade goal's progress will be updated and a new data point will be added. If no new data is found, the goal's progress will stay the same and no new data point will be added.
You can manually sync whenever you like by pressing the "Sync now" button beneath the tracking dropdown within any goal.
Do data points overwrite if the values change for the same date?
No, another data point will be added for that date onto the tracking map as to preserve any potential data loss.
Functionality around overwriting historical data points for the same date can be turned on for your account specifically, just reach out to your Cascade contact asking them about it!
I'm getting a "Connection does not work" error message.
In this case, the best option is to delete your connection and reconnect.
-
Go to Integrations and use the trash icon to delete the connection.
-
Follow the preceding instructions to set up a new connection.
My data is not showing up!
-
The cell that you link to Cascade can have only numbers and related characters, like percent and currency signs. Check the cell to make sure there are no letters or special characters.
-
Ensure you are logged into a Microsoft 365 business account, not a personal account.
I cannot find the correct Excel sheet to integrate with.
-
The Excel sheet will need to be located in your OneDrive account or on a SharePoint site to be able to access it with this integration
-
The sheet will need to be in .xlsx format
-
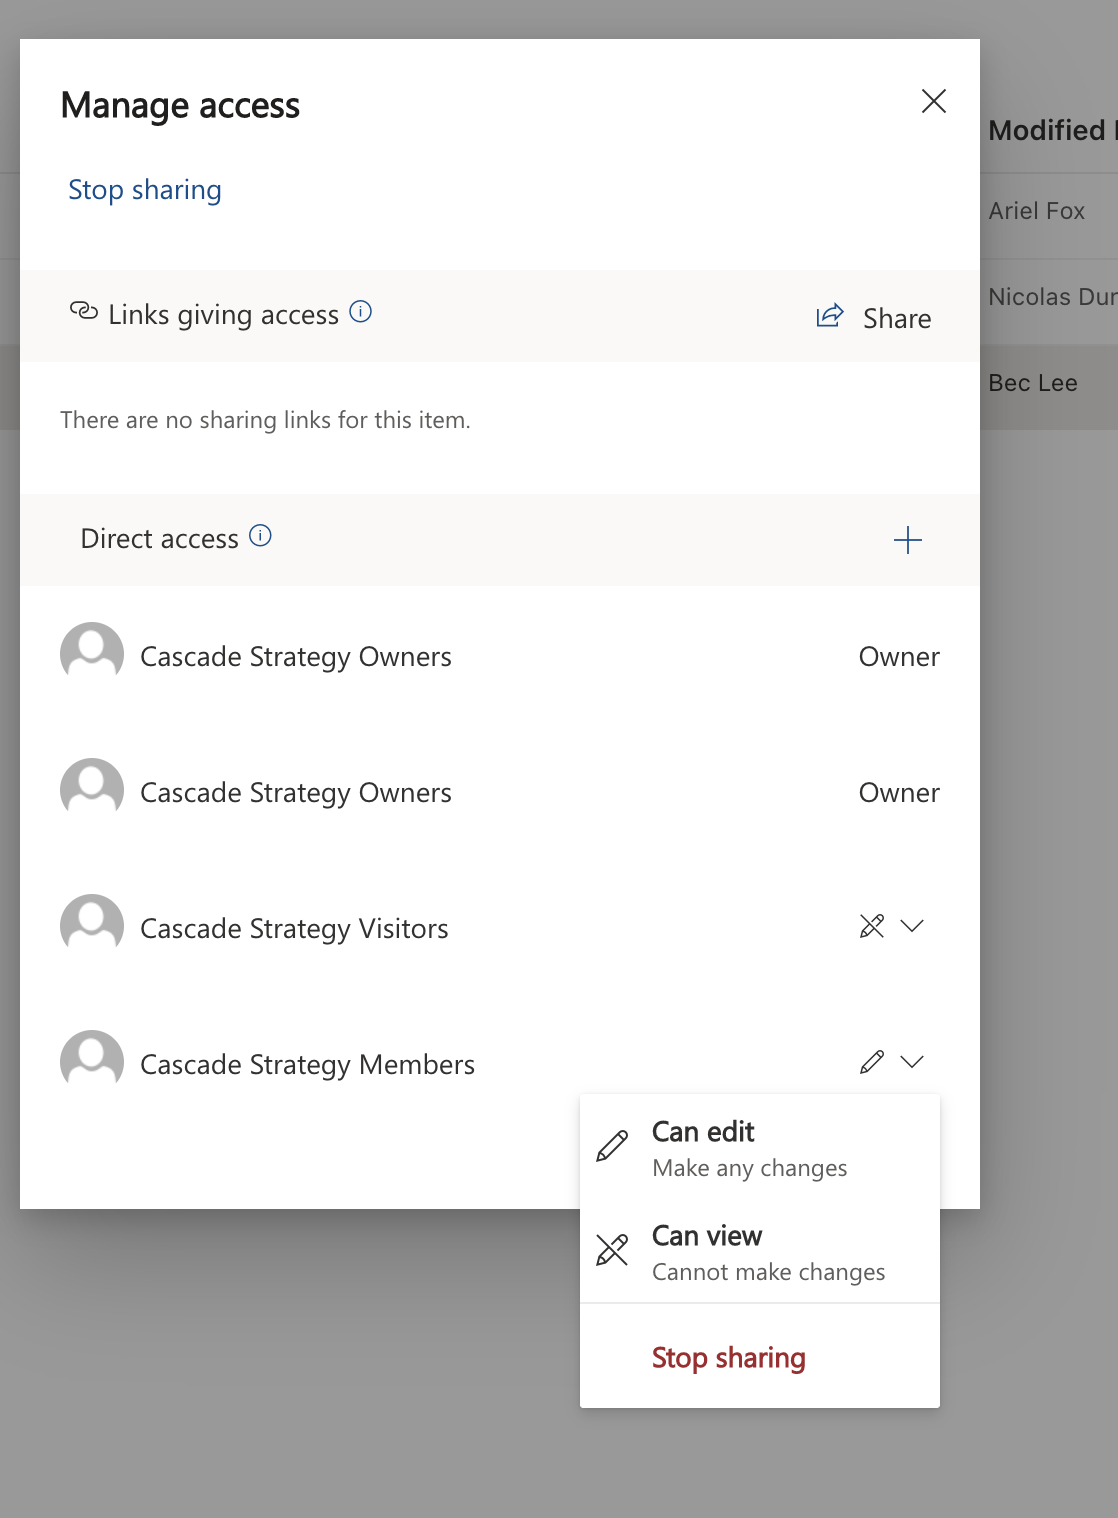
If hosted within a SharePoint, a group that you are part of must be provisioned access to that file, or yourself directly.
-
In most cases you will have the correct permissions provisioned automatically for any file that is uploaded to a SharePoint, regardless of who uploaded the file
-
Managing access within SharePoint:
Still need help?
Get in touch! Send us an email at support@cascade.app.