.png?width=200&height=80&name=Classic%20Experience%20(1).png)
Connect Cascade to hundreds of other apps with Power Automate!
Cascade’s Power Automate connector is an extremely powerful tool to create integrated and automated workflows between Cascade and other applications. These automated connections called ‘Flows’ can be created easily and allow you to pipeline data and build workflows between apps that otherwise wouldn’t be possible.
Getting Started with Power Automate
Cascade’s connector is classified as ‘Premium’ and will require a Power Automate license. If you already have a Microsoft 365 or Dynamics 365 license provisioned to you through your company you will likely have Power Automate capabilities. See the Power Automate pricing for the list of plans that include Power Automate capabilities.
How do I create a flow?
-
Here is a help article on how to create a Power Automate flow
Each flow has three different ways to Trigger them:
-
Automated cloud flow: A certain action in an app acts as the trigger which causes one or more Actions in other apps to take place. The trigger is where your data comes from, and your action is where your data gets sent automatically.
-
For example, send data into Cascade anytime someone Publishes a Microsoft Projects report
-
-
Instant cloud flow: Start an automation with a click of a button. You can automate for repetitive tasks.
-
For example, send data into Cascade anytime someone Publishes a Microsoft Projects report
-
-
Scheduled cloud flow: Schedule an automation flow on a specific time schedule.
-
For example, a daily data upload from a SQL database to Cascade
-
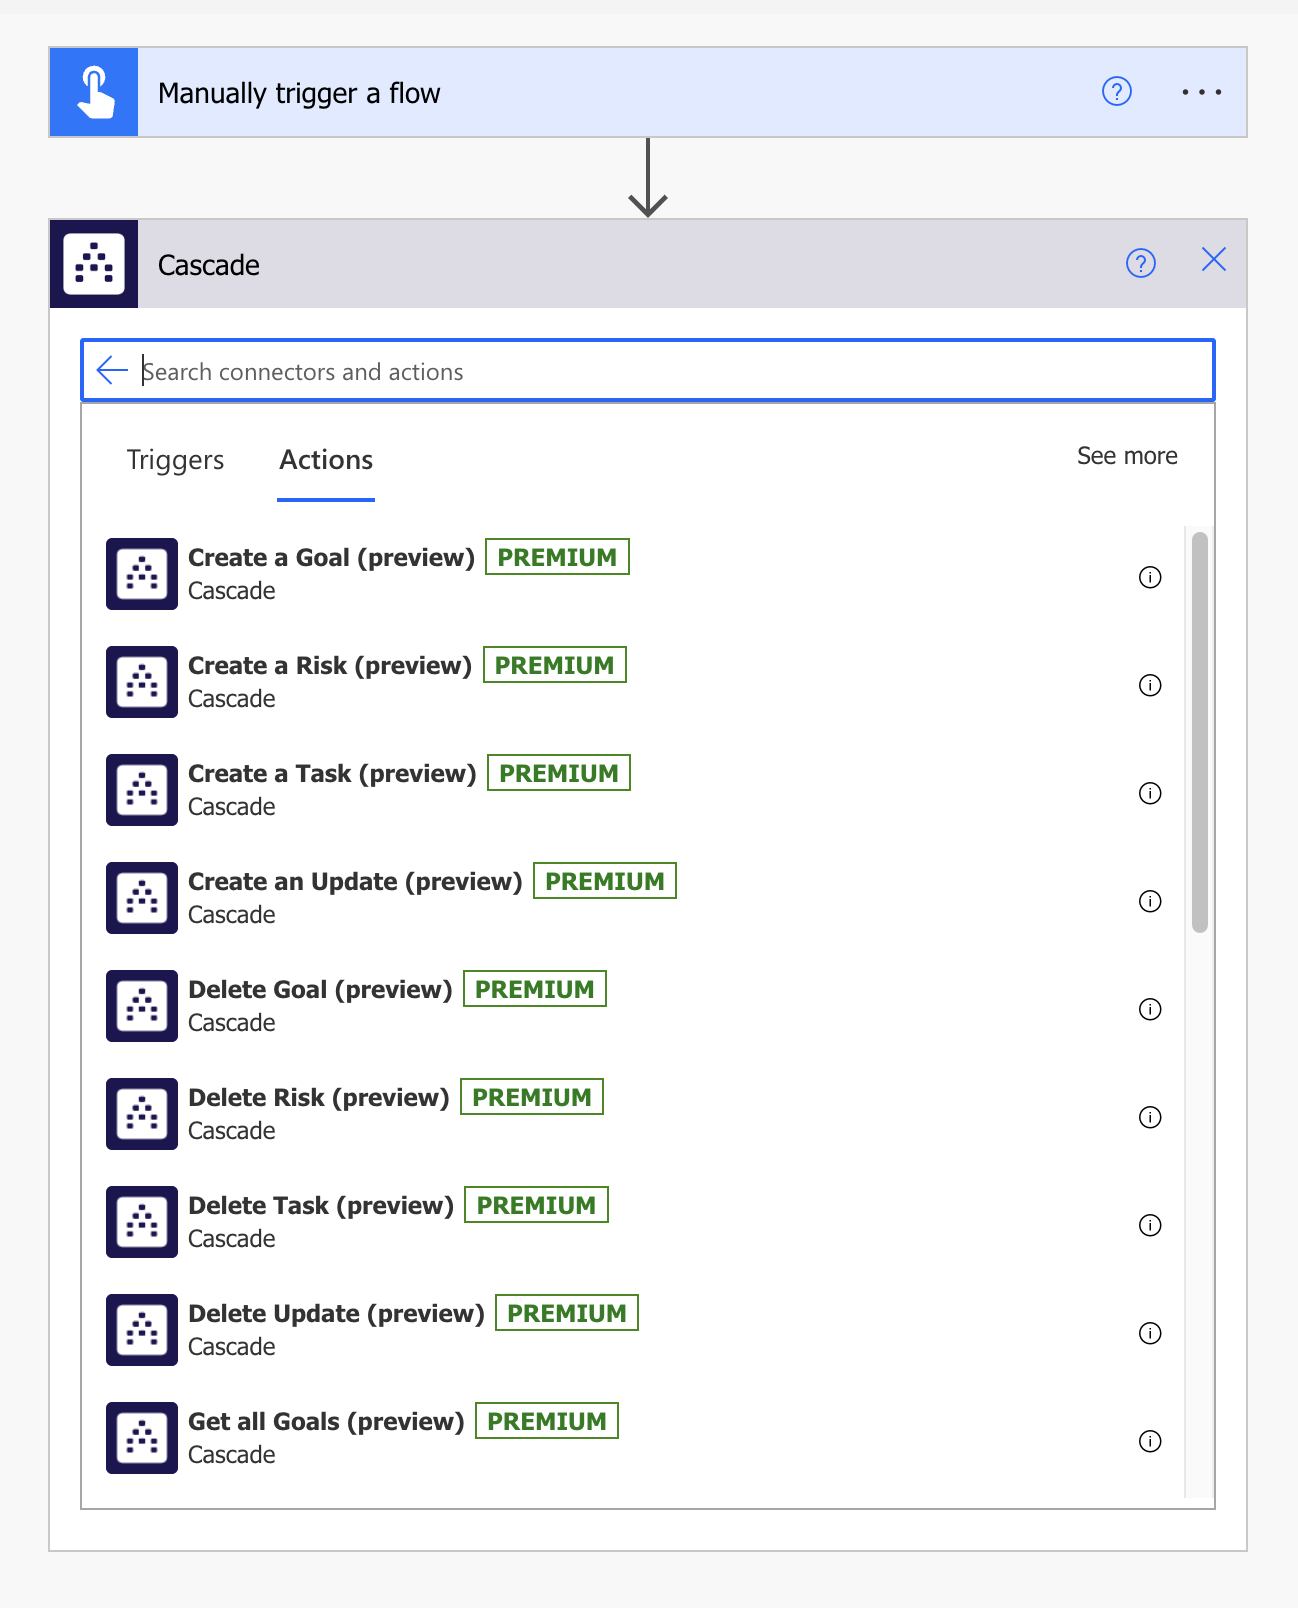
How do I use Cascade’s Power Automate connector?
-
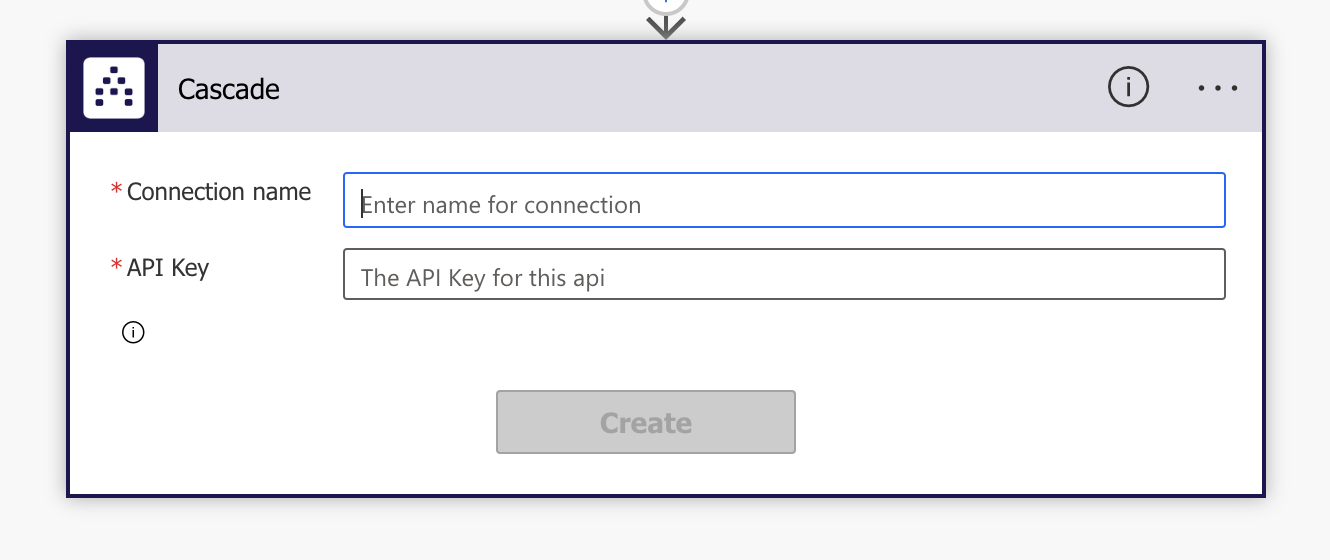
Once you choose a Cascade action to use you will be prompted to create a connection to your Cascade instance.
-
Connection name: Name this anything you would like
-
API Key: You will need an API Token. Please reference this article for how to generate an API access token
-
When creating a connection within Power Automate, please be sure to include the text 'Bearer ' in front of your token.
-
Bearer 1D22717FAF450E414523DAA4E48976SDF87SDFS8
-
-
-
-
You can use this connection for every Cascade action having to do with the same Cascade instance.
-
Once the connection is made, depending on the action you have chosen you will be prompted to enter information. The red asterisk means the field is mandatory.
-
This is where you will be able to dynamically use information from the previous steps in your flow to populate fields in the Cascade connector. That way you will be able to create a flow once and every time it runs there will be new information being brought into Cascade.
Actually creating a Power Automate flow will take some practice. Please use these resources to help get started:
Looping through data
Depending on the data that you want to bring into Cascade you may have to loop through it if it is a list of data points. This is where the power of Power Automate is really highlighted. You can loop through data to update multiple items within Cascade, even adding conditional and custom logic to the loops and conditions.
For example, if you are bringing in information from a Microsoft Project report you can loop through data inside the report looking for a specific ID of a specific task and then updating a particular Cascade goal with that newly published information
Here are some resources on loops within Power Automate
List of fields within the different actions of Cascade’s connector and what they mean:
-
Cascade Instance: Your Cascade instance name -https://YOURINSTANCE.executestrategy.net
-
Goal ID: ID of the Goal to assign a risk, task, update to.
-
There are three ways to obtain the ID of a goal:
-
Goal URL: Click on the goal itself and within the URL you can find the Goal ID associated with the “modelId=GOALID”. The goal ID in this URL is 65, https://YOURINSTANCE.executestrategy.net/goaldeck/goals?componentName=goal-sidebar&modelId=65&modelType=goal&previousViewType=overlay&viewType=overlay
-
Snapshot: Create a snapshot and include the ‘Goal ID’ within the Select Columns section of the snapshot. Then generate the snapshot.
-
Bulk Edit: Click on your initials on the bottom left of the screen and make sure to include the Goal ID within the Goal Columns section. Then click on Generate Report
-
-
-
Risk ID: ID of a Risk. You are only able to obtain this using Cascade’s API
-
Using the API, you can send a GET request to the https://{instance}.executestrategy.net/api/v2/risks API endpoint
-
-
Task ID: ID of a Task. You are only able to obtain this using Cascade’s API
-
Using the API, you can send a GET request to the https://{instance}.executestrategy.net/api/v2/tasks API endpoint
-
-
Update ID: ID of an Update. You are only able to obtain this using Cascade’s API
-
Using the API, you can send a GET request to the https://{instance}.executestrategy.net/api/v2/updates API endpoint
-
-
Action: The first word of a Goal’s title – This is typically the action word
-
Details: The remainder of the goal’s title – After the ‘Action’ word
-
Start Time: Intended start time of goal
-
Format must be in Unix or ISO 8601
-
-
End Time: Intended end time of goal
-
Format must be in Unix or ISO 8601
-
-
Weight ID: The weight of a resources’ priority. The highest priority is 1. The lowest is 4
-
Role ID: The ID of the role that will own the goal, task, risk, or update. The owner of resources within Cascade are determined by the role that is assigned to it. The user that occupies that role is then assigned as the owner.
-
Creator ID: ID of the user who created the goal
-
Status: The status of the goal
-
APPRO: Approved – fully launches and creates goal
-
DRAFT: Creates a draft goal
-
ARCHI: Archives goal
-
-
Completion Criteria: Criteria to determine whether the goal is complete
-
Target Flow: The tracking direction of the goal. If over, higher values are better. If under, lower values are better.
-
Initial: Initial value of the goal’s progress
-
Progress: Current Progress of goal progress
-
Target: Expected Target of the goal
-
Is Private: Whether goal is private or not
-
This field is Binary:
-
0 - No
-
1 - Yes
-
-
-
Tracking type: Tracking schema used to track the goal. This is represented in a Cascade goal as the drop down menu in between the Goal’s Initial and Target value
-
Entity Template ID: ID of the goal, task, risk, or update template
-
To learn about entity templates please visit this article
-
To obtain the ID of the entity template please click your initials on the bottom left > Customize Fields > then click the template (KPI, Objective, Task, etc.). In the URL you will see the ID as the number in the URL. For example, the ID in this URL is 2
-
-
Direct Focus Area: ID of the parent Focus Area(s). This should only be assigned if you want the goal to appear as a ‘Top-Level’ goal in that focus area. This is how to assign top-level alignment
-
Aligned from IDs: Goal IDs of child goals that are nested under this goal. This is how to assign child alignment
-
Aligned to IDs: Goal IDs of parent goals that the goal is aligned to. This is how to assign parent alignment
-
Issue: Title of a Risk
-
Is Critical: Whether risk is critical or not
-
This field is Binary:
-
0 - No
-
1 - Yes
-
-
-
Is Resolved: Whether risk is resolved or not
-
This field is Binary:
-
0 - No
-
1 - Yes
-
-
-
Likelihood: Likelihood of the Risk
-
Consequence: Consequence of Risk
-
Task: Title of a Task
-
Description: A description of a Task
-
Comment: A comment associated with an Update
List of actions for Cascade’s Power Automate connector:
-
Create a Goal: Creates a new Goal within an instance.
-
Create a Risk: Creates a new Risk on an existing Cascade Goal.
-
Create a Task: Creates a new Task on an existing Cascade Goal.
-
Create an Update: Creates a new Update on an existing Cascade Goal.
-
Delete Goal: Deletes a Goal based off of its Goal ID.
-
Delete Risk: Deletes a Risk based off of its Risk ID.
-
Delete Task: Deletes a Task based off of its Task ID.
-
Delete Update: Deletes an Update based off of its Update ID.
-
Get all Goals: Returns all Goals within an instance.
-
Get all Risks: Returns all Risks within an instance.
-
Get all Tasks: Returns all Tasks within an instance.
-
Get all Updates: Returns all Updates within an instance.
-
Get single Goal: Returns a single Goal based off of its Goal ID.
-
Get single Risk: Returns a single Risk based off of its Risk ID.
-
Get single Task: Returns a single Task based off of its Task ID.
-
Get single Update: Returns a single Update based off of its Update ID.
-
Update a Goal: Updates an existing Goal's details based off of its Goal ID.
-
Update an Update: Revises an existing Update's details based off of its Update ID.
-
Update Risk: Updates an existing Risk's details based off of its Risk ID.
-
Update Task: Updates an existing Task's details based off of its Task ID.
Troubleshooting / FAQs:
-
Invalid Token: If you get this error, please make sure your API token is valid. When creating the connection you input it in this exact format:
-
Bearer 1D22717FAF450E414523DAA4E48976SDF87SDFS8
-
-
If flow does not run correctly, please check the instance name to make sure it is valid
-
A Cascade employee can obtain a Risk, Task or Update ID for you if you are unable to use the API to access this information
-
If updating a goal’s current progress, the tracking type for the goal will need to be set to ‘Manual’ before the progress can be overwritten. You can either do this in Cascade or you can make an additional step in the Power Automate flow to change the tracking type to ‘Manual’ before changing the goal’s current progress
-
Once you create a Risk on a goal you cannot transfer that Risk to another goal, but you are able to do so with Updates
-
To change the date on an update you must first create the update then can change the date in another flow
-
The User ID when Creating an Update is completely dictated on who the API token is assigned to
-
You can use the Update and Update action to change it
-
-
Please reach out to integrations@cascade.app with any questions!