How to Enable and Disable Plans
Within Cascade, you have the option to enable and disable plans as necessary.
Enable a Plan
First, to enable a plan, you'll want to make sure the plan is listed in Cascade as a separate Org Unit. Learn more about how to add plans and org units.
-
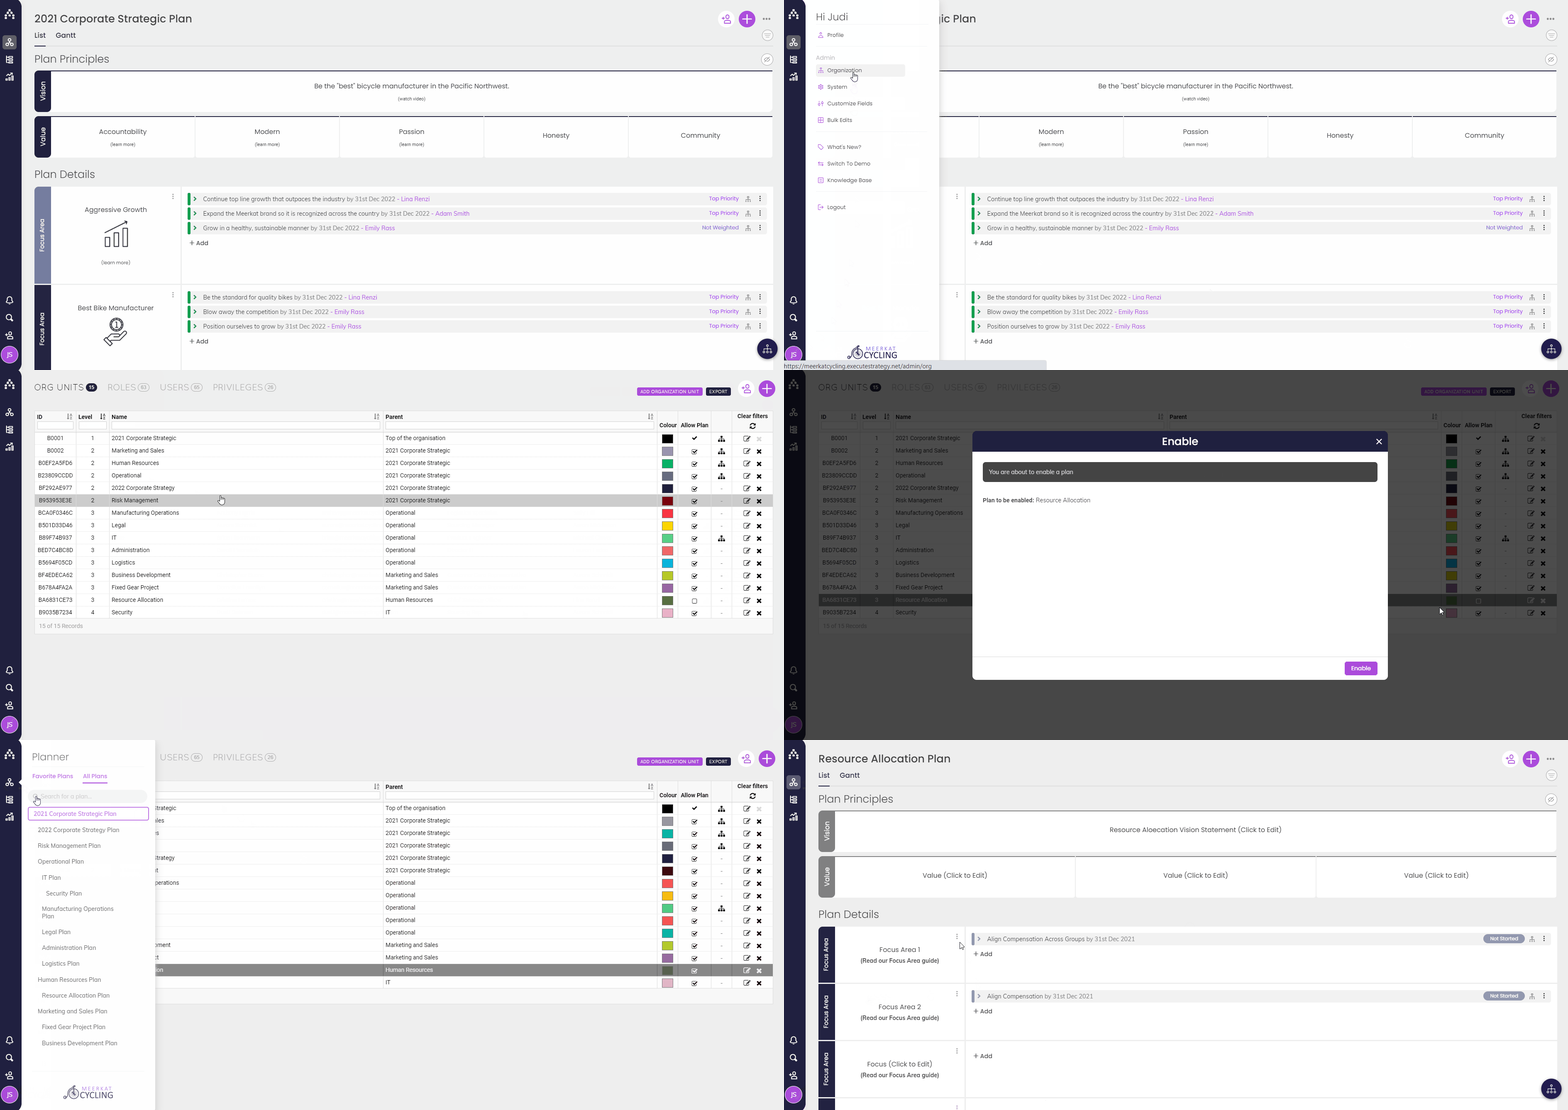
Navigate to Profile > Organization and select "Org Units" at the top. On this page, you should see a list of the different plans in the system along with the color option and a column for "Allow Plan."
-
Click on the plan you want to enable and check the box to allow the plan. A pop-up will have you confirm by selecting "Enable."
-
Once the plan is enabled, navigate to Planner and click on the plan name in the upper right-hand corner to pull up the list of active plans. Select the newly enabled plan.
Disable a Plan
You may need to disable a previous plan that is no longer needed and you do not want appearing on snapshot or dashboards.
-
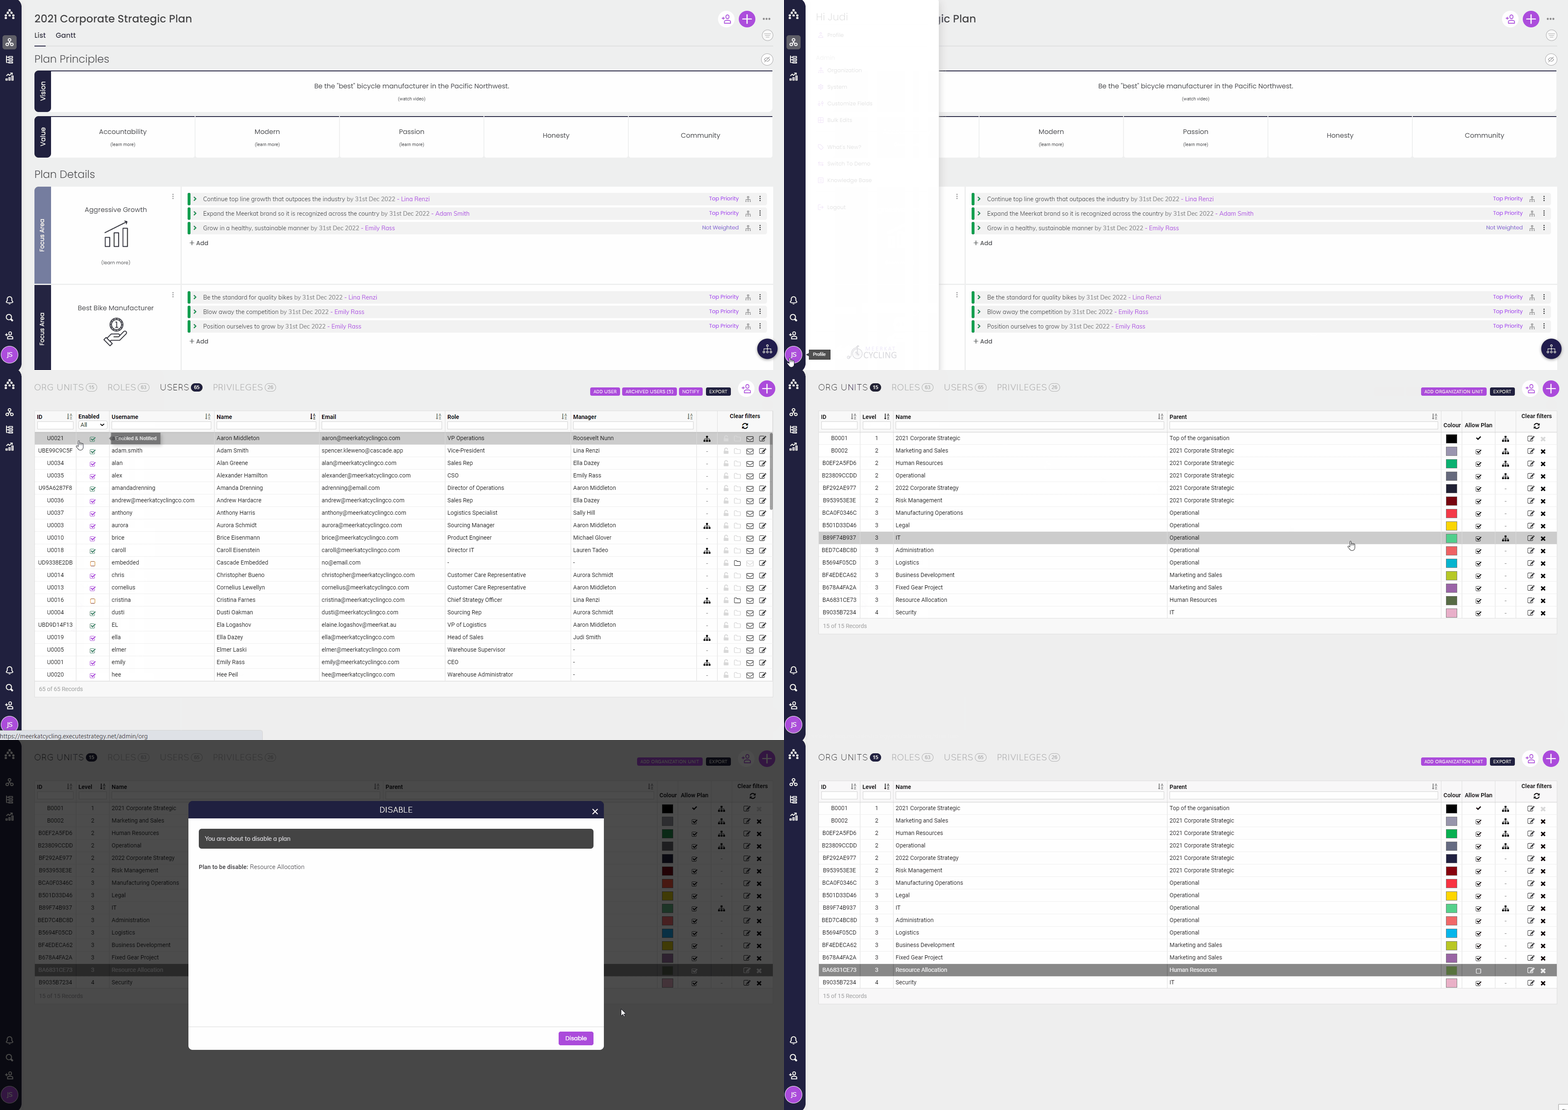
Navigate to Profile > Organization and select "Org Units" at the top.
-
Click on the plan you want to disable and un-check the "Allow Plan" field and confirm you want to disable the plan by selecting "Disable."
-
The plan you disabled will no longer show up in the list of active plans and the information will not appear in snapshots or dashboards.
Before disabling a plan, you may want to archive or delete the previous plan information. Learn more about how to archive or delete a plan.
Note: Only users with Strategy Permission will be able to enable and disable plans within Cascade. Contact your administrator for Cascade if you need assistance with permission.
.png?width=200&height=80&name=Classic%20Experience%20(1).png)

