.png?width=200&height=80&name=Classic%20Experience%20(1).png)
Introduction:
For this integration we are going to be using an application called Zapier. Zapier allows us to sets triggers and actions according to what outcomes you need. In this case we will be using Zapier to update goal progress in Cascade from new or updated spreadsheet rows in Google Sheets. With this automated process, you would no longer need goal owners to go into each goal in Cascade periodically to update progress. This is especially valuable for metric/KPI updates in bulk.
Setting Up Google Sheets:
Create a new Google sheet and set up your sheet similar to the screenshot below. We include the column Cascade Goal ID in the sheet so that we can set up an integration to update multiple goals in one single sheet. Your Cascade goal ID can be found in its URL, for example the goal ID for goal https://example.executestrategy.net/user/goals/8 is 8.
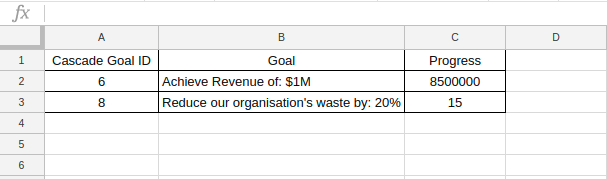
Note: You can also find goal IDs in bulk by using the "Goal ID" column in either Snapshots (any user) or Bulk Edits (admins)
Setting up the Zap:
1. Creating the Zap:
Assuming you already have a Zapier account, to create the Zap click the large orange "MAKE A ZAP" button to the left of your account navigation.
Once you've done this you will be taken to the Zap builder interface:
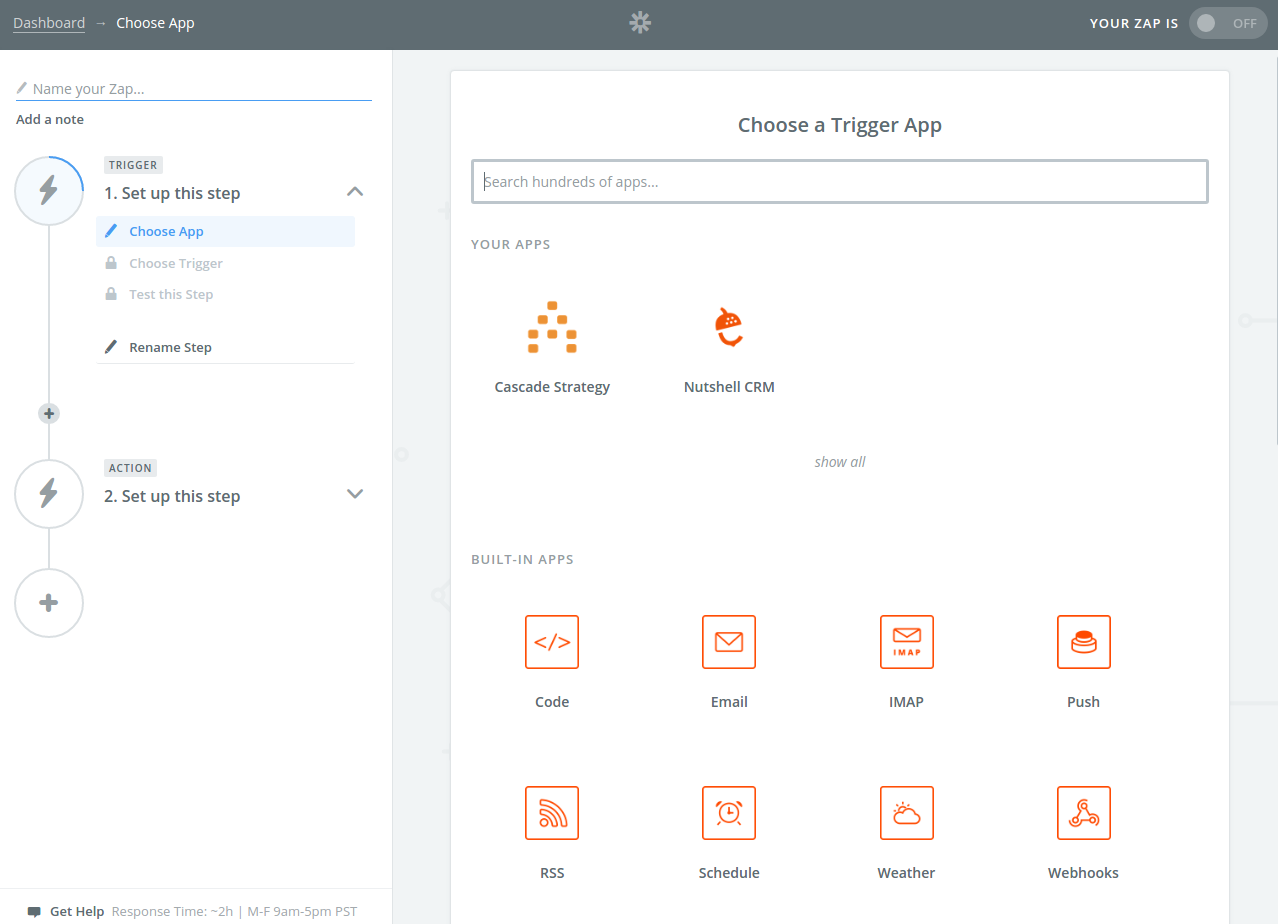
When you reach this interface screen make sure to name your Zap in the top left corner!
2. Setting up the Zap Trigger:
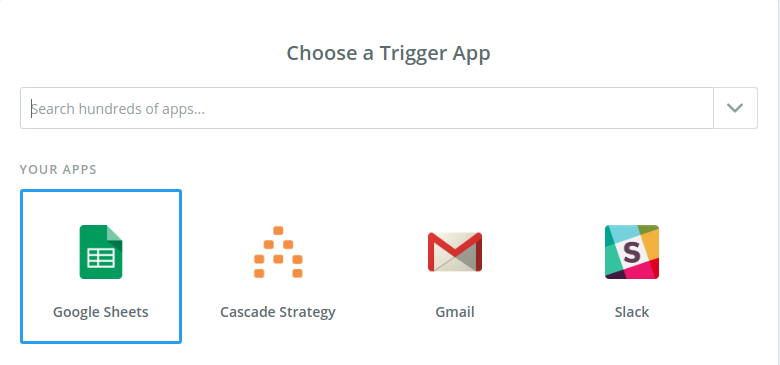
The trigger is the changes in Google Sheets that will tell Zapier to perform the rest of the actions. To add the trigger simply search for "Google Sheets" and select it:
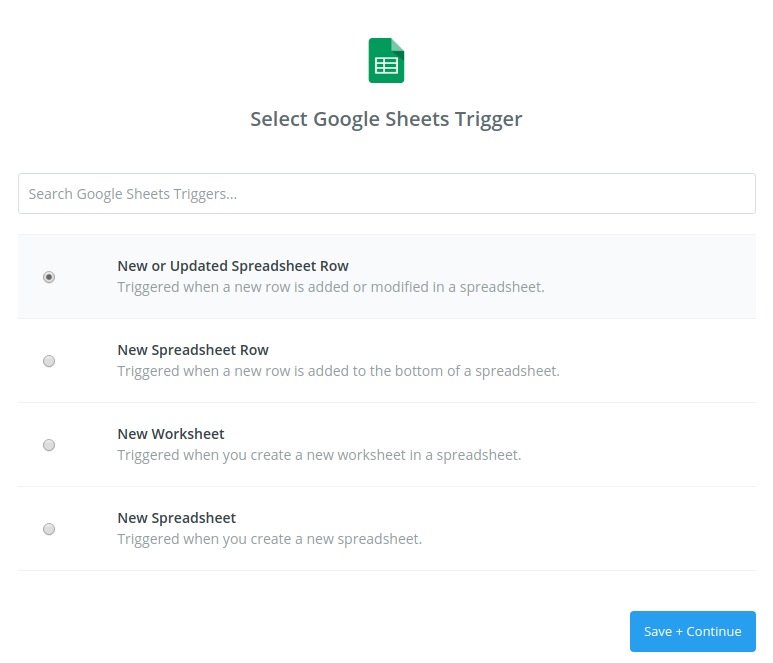
After selecting this you will then be asked to choose the action that you wish to trigger with Zapier, for this example we are going to use the "New or Updated Spreadsheet Row" trigger.
After selecting the trigger activity by clicking 'Save + Submit', you will then be prompted to log into your Google account. Click the 'Connect an Account' button and proceed to log in with your Google account details.
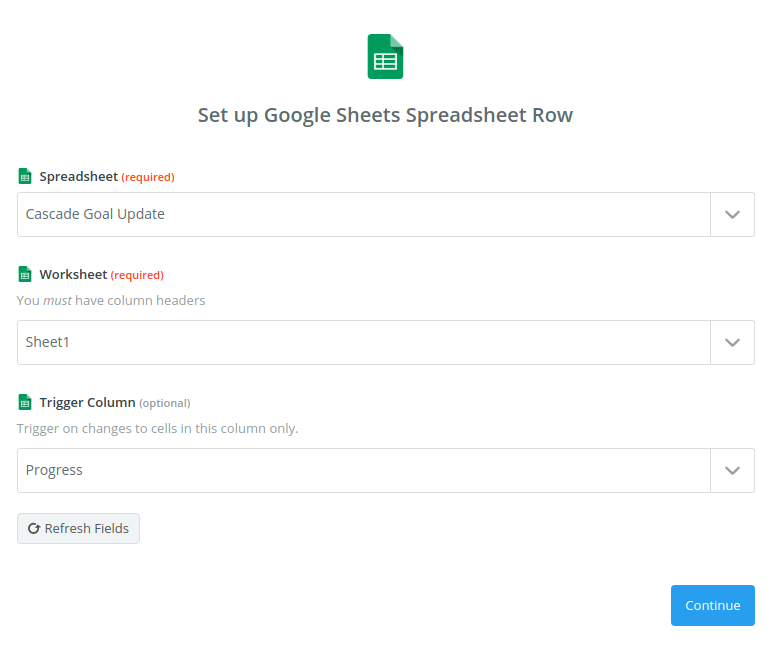
Next step is to set up your spreadsheet triggering row. Select your spreadsheet and worksheet, select 'Progress' as your trigger column.
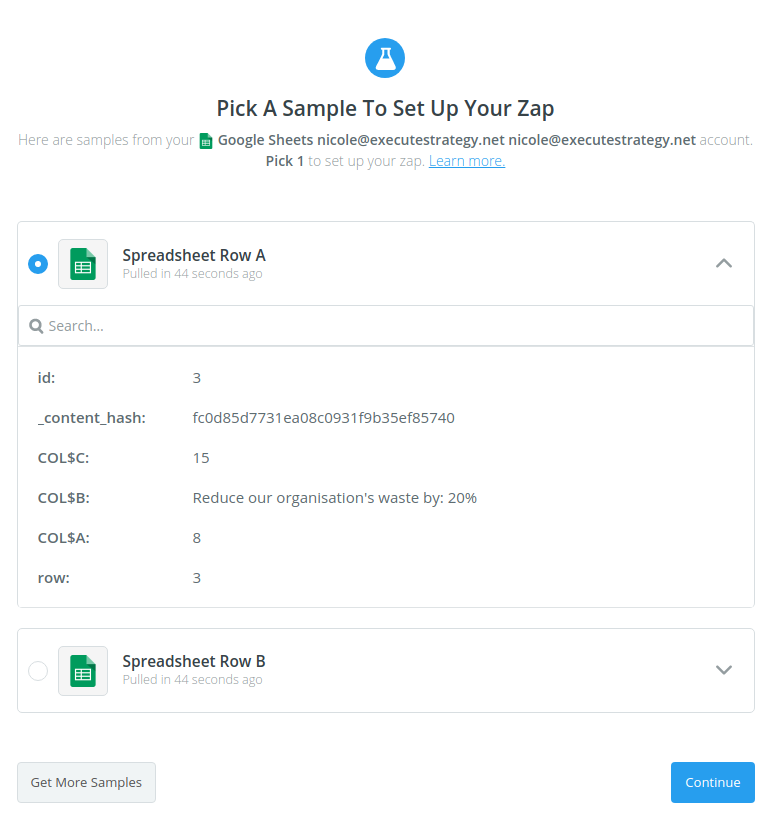
Click 'Continue' and Zapier will pick a sample retrieved from your sheet for you to set up your Zap.
3. Setting up the Zap Action:
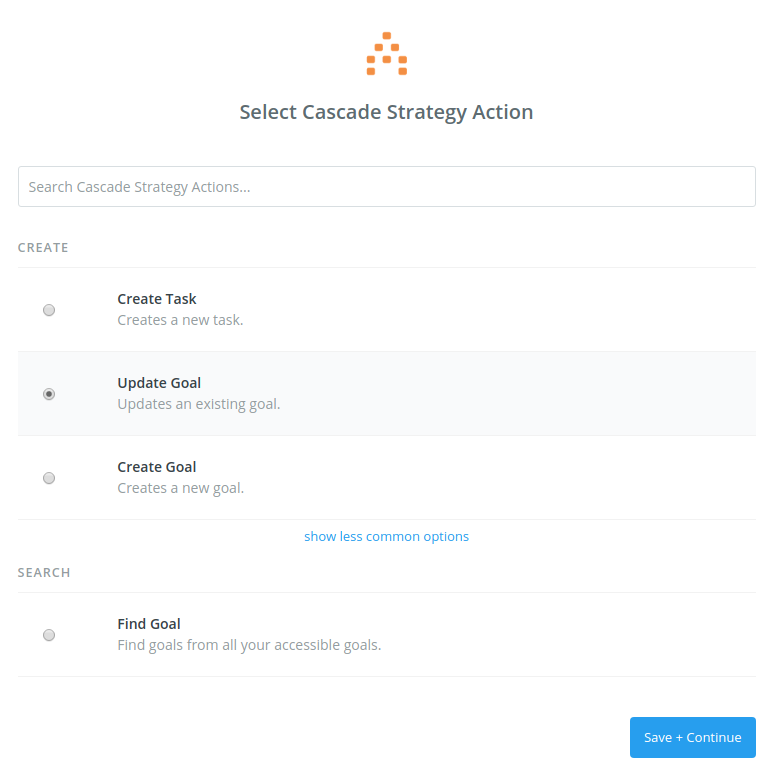
In this step, we will update the number retrieved from previous step as goal completion to Cascade. To add the action simply search for "Cascade Strategy" and select it. Then select 'Update Goal' as action.
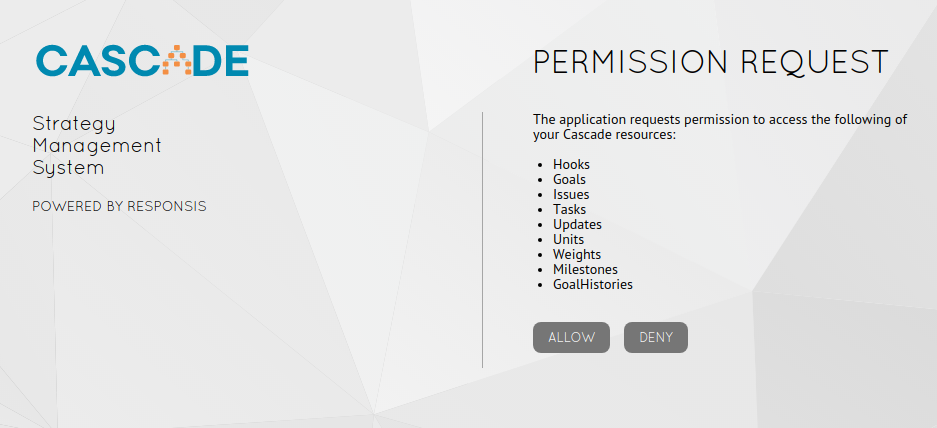
After selecting the action by clicking 'Save + Submit', you will then be prompted to connect your Cascade account. Click the 'Connect an Account' button and enter your cascade instance and log in to your account to connect.
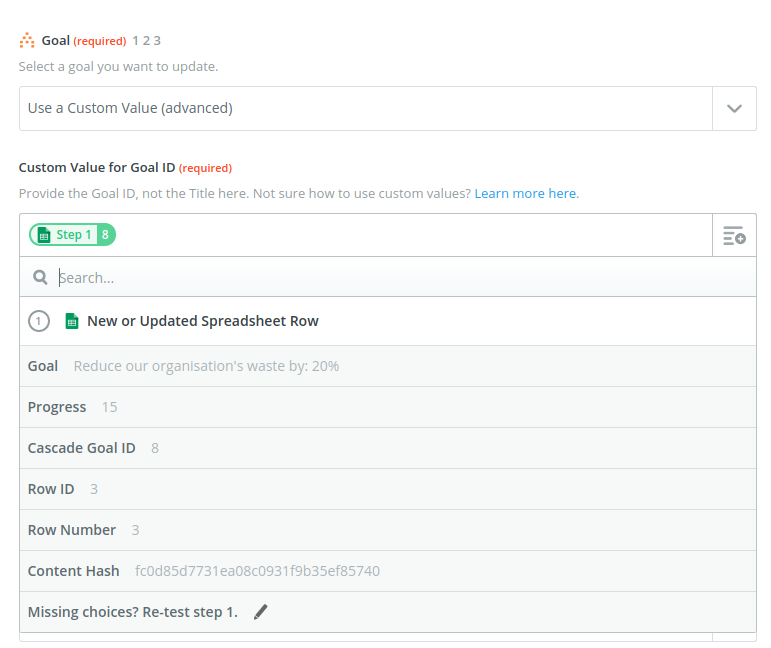
In Set Up Cascade Strategy Goal step, select 'Use a Custom Value (advanced)' for Goal, and select 'Cascade Goal ID' for Custom Value for Goal ID. This step is telling Zapier to look for the goal in Cascade with the goal ID in the spreadsheet to update. This way you can have multiple goals in your spreadsheet, if the 'Progress' column in one specific row is updated, Zapier will look for the corresponding goal with the goal ID on that row to update in Cascade.
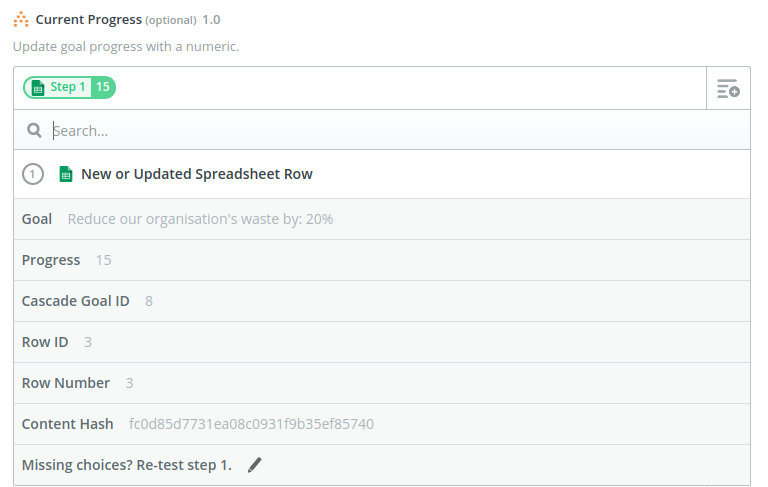
You also need to select 'Progress' for Current Progress. All other fields can be left blank.
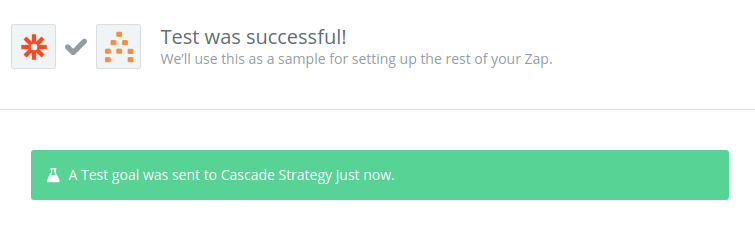
Then click on 'Continue' and send test to Zapier. If your test was successful, you can see the goal progress has been updated in Cascade.
Common Problems:
Q: My test with Zapier was unsuccessful and it returned error message 'You are not permitted to use this action'.
A: This is due to your Cascade account does not have the power to update on this goal. To be able to update on a goal, you need to either have appropriate permissions to access or is a owner or co-owner of the goal.
Q: My test with Zapier was successful but my goal was not updated in Cascade.
A: Check the tracking type of your goal. If a goal is auto-tracked, its current progress will not be updated by Zapier. Change its tracking type to 'Manual Tracking' and run the test again.