.png?width=200&height=80&name=Classic%20Experience%20(1).png)
Updates allow you to give a written comment on the progress of your Goal or communicate any other relevant information. Adding an update is as simple as opening your Sidebar for a Goal and using an update button.
Luckily, the Sidebar can be used essentially anywhere you can click on a Goal's title in Cascade. See this article for more information on the Sidebar.
Where to Add Updates to Goals
Updates can be entered from anywhere you can open the Sidebar for your Goals. Depending on your role and preference, any of these places can work:
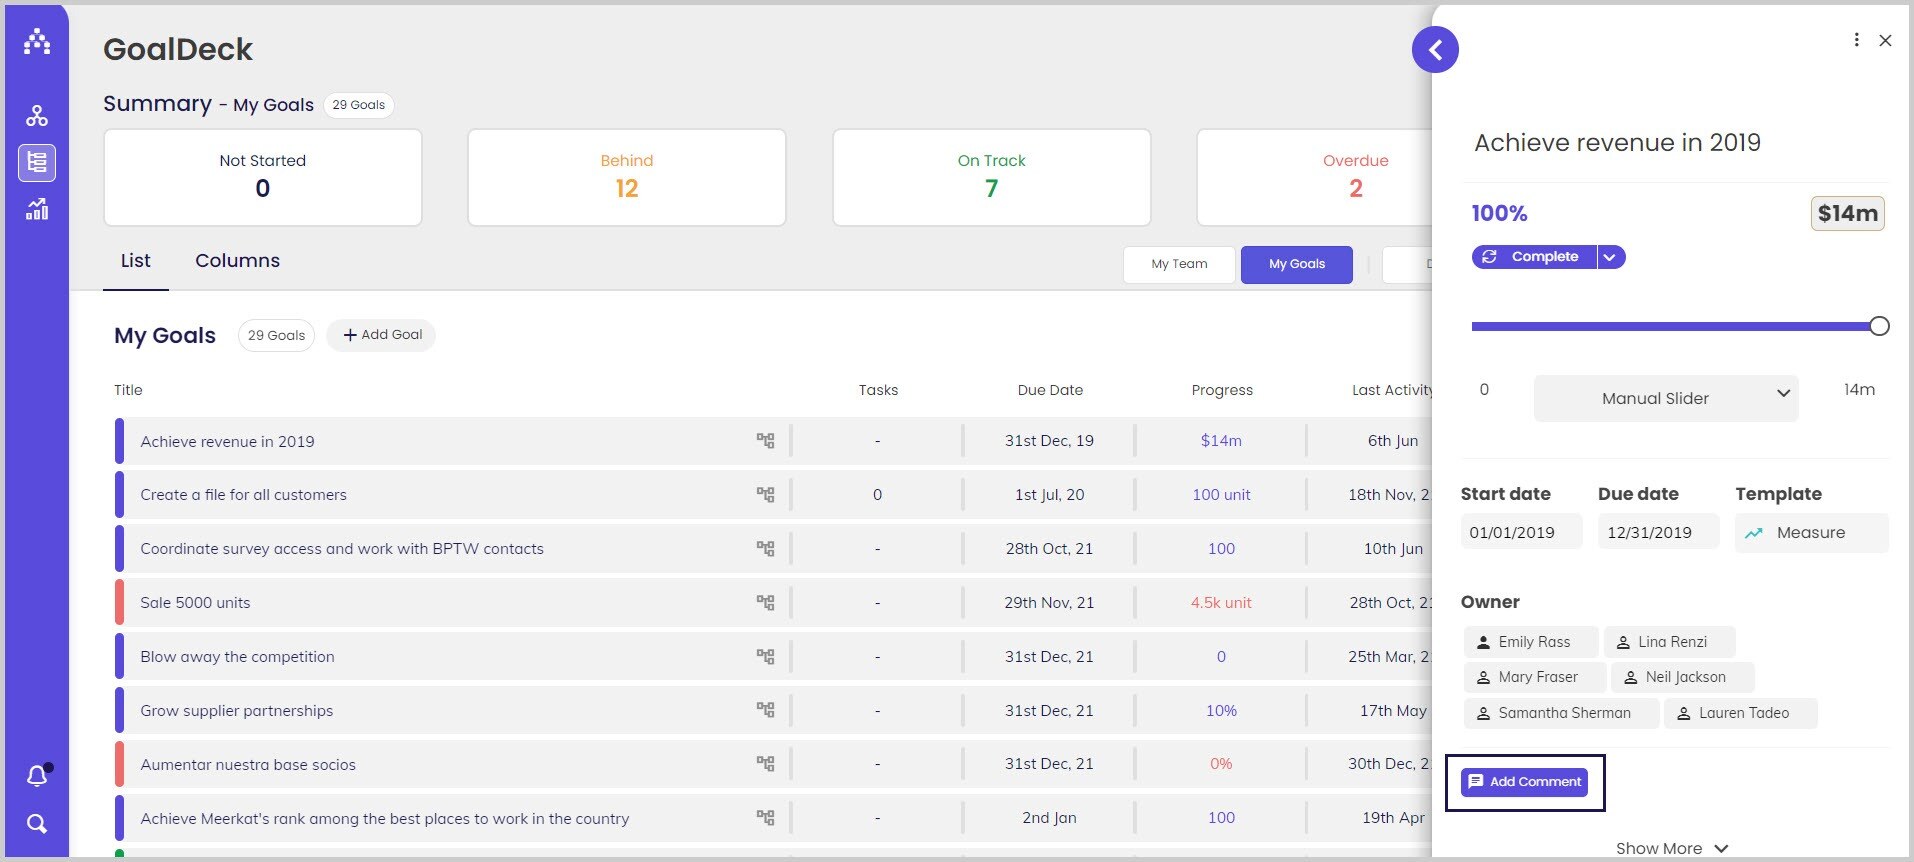
GoalDeck
The second option in the navigation bar. GoalDeck is a perfect place to always find anything you and your team own in one place.
Simply click the title for any goal listed here to open the Sidebar and add comments in real time. You can also update the status and progress via the table!
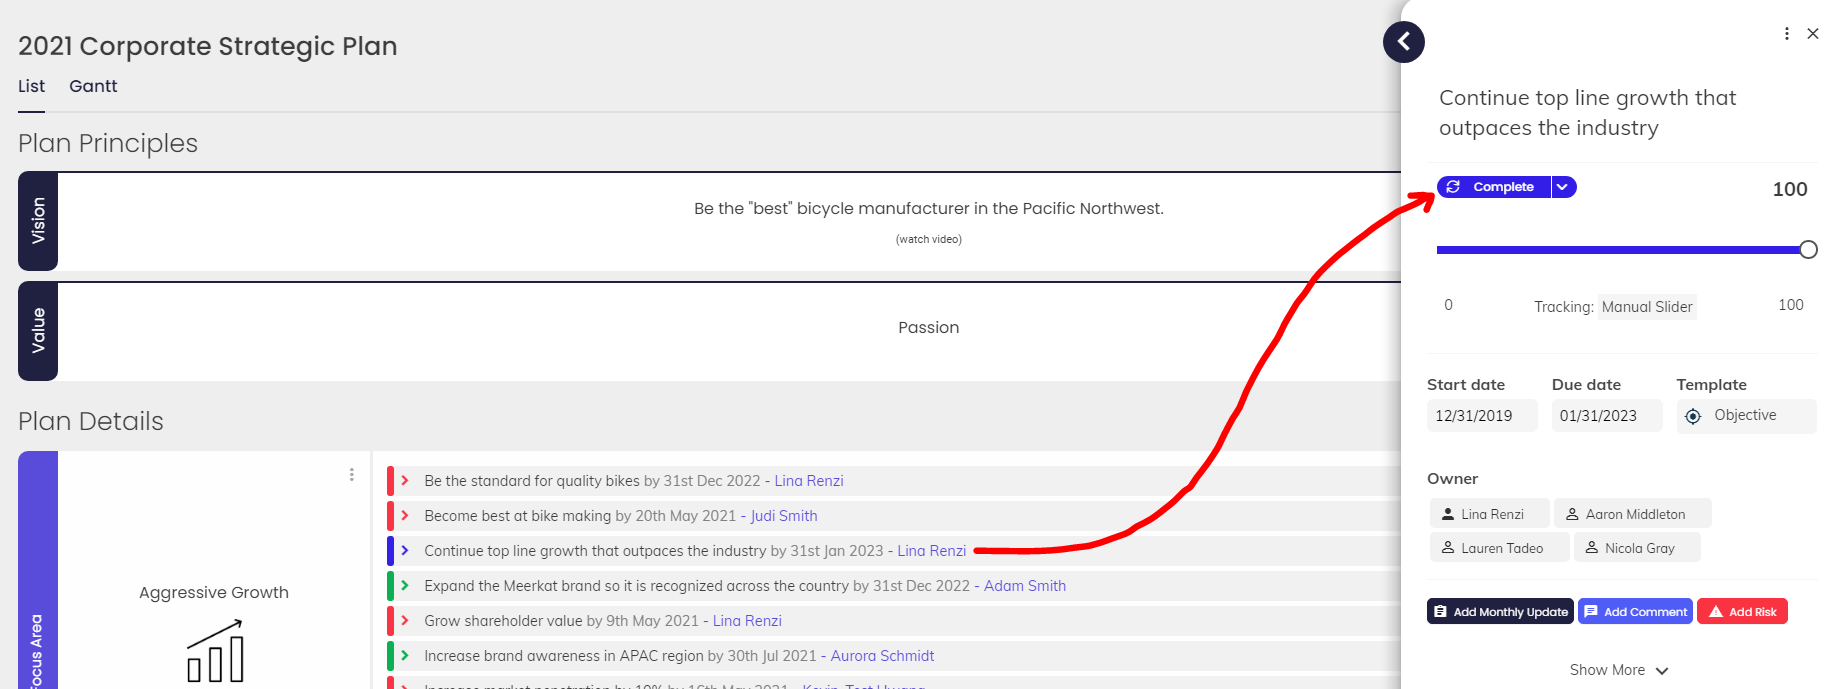
The Planner
Although the Planner is a high-level view, it's still a good place to enter updates.
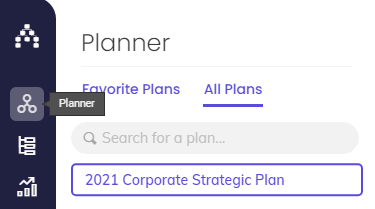
Just like with GoalDeck, click the title for any listed goal to open the Sidebar.
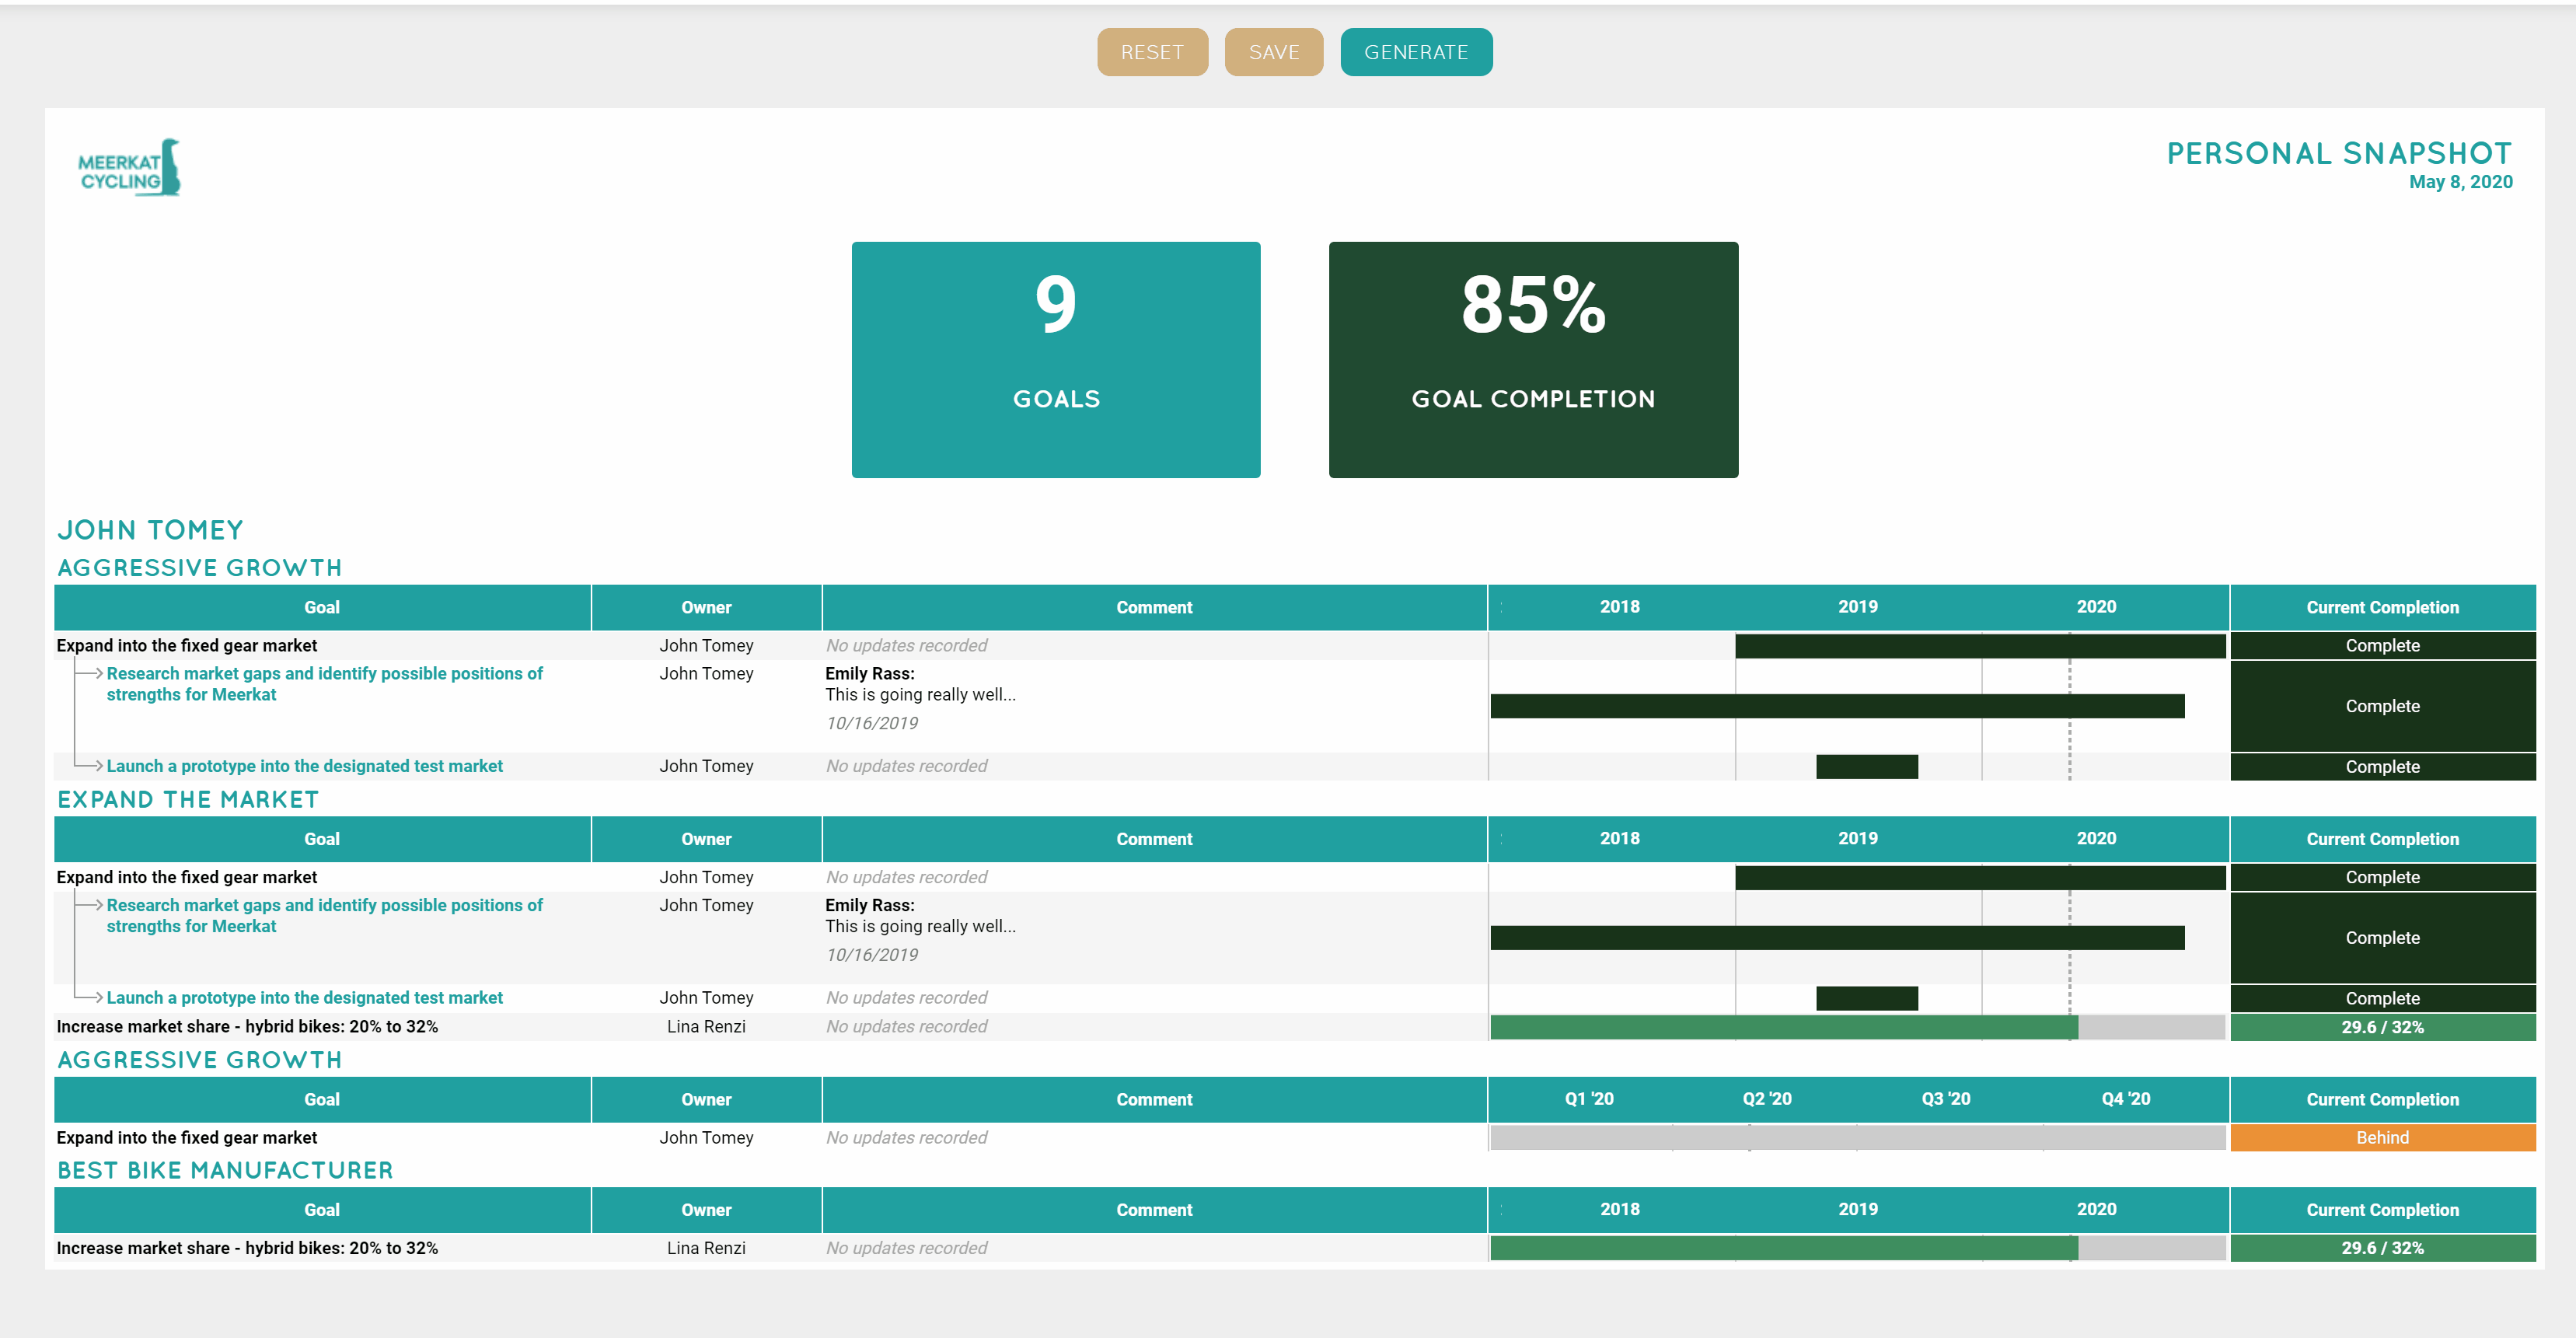
Dashboards and Snapshots
When we say the Sidebar can be used anywhere, we mean it! You can certainly build custom Dashboards or Snapshot reports for entering updates if you prefer.
Although these are not "out-of-the-box" options for entering updates, Snapshots have been a favorite across our client base because of how an already-generated report can have updates entered onto it in real time!
Not to sound like a broken record, but we have the Sidebar to thank for that. 😃
Mentions (Tagging other Users with "@")
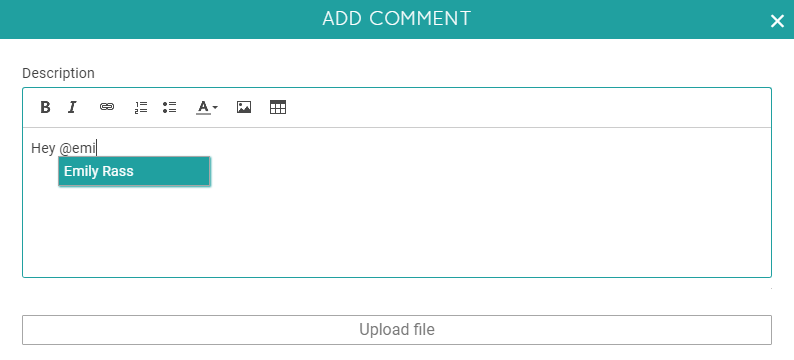
When creating an update, Cascade gives you the ability to mention other Users in your updates using our "@"mention function. Simply type the "@" symbol and then type in the user's name who you wish to mention.
Once a user has been tagged, they will receive a notification in their Cascade account with a link that will take them directly to the mention. They'll also receive an email notification with the same link, if email notifications are turned on.
Attaching Files
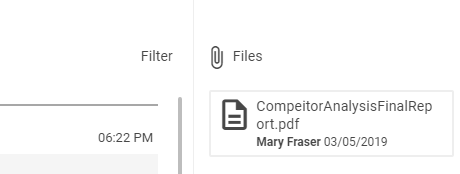
When creating an update, Cascade allows you to upload and attach a file if the Upload File field is available on that Update Template. Simply click "Upload file" and then browse your computer for your file.

Once the file is attached and the update has been submitted, you'll be able to view your file in the Files section of the Goal Hub (expanded Sidebar).
Editing & Deleting Updates
Cascade allows you to edit or delete any of your narrative updates. To do so, open the "Activity" section of the Sidebar or Goal Hub and hover your mouse to the right hand side of the update to show a pencil button.
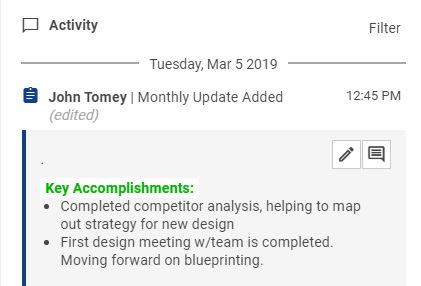
As a side note, this is also where you can add Comments to updates using the button next to the pencil. Tagging can be done in Comments the same way as with Updates!
After clicking the pencil, you'll be given the option to edit the update and save, or to delete the update. To make sorting through updates easier, we suggest expanding the Sidebar and working off of the Goal Hub.
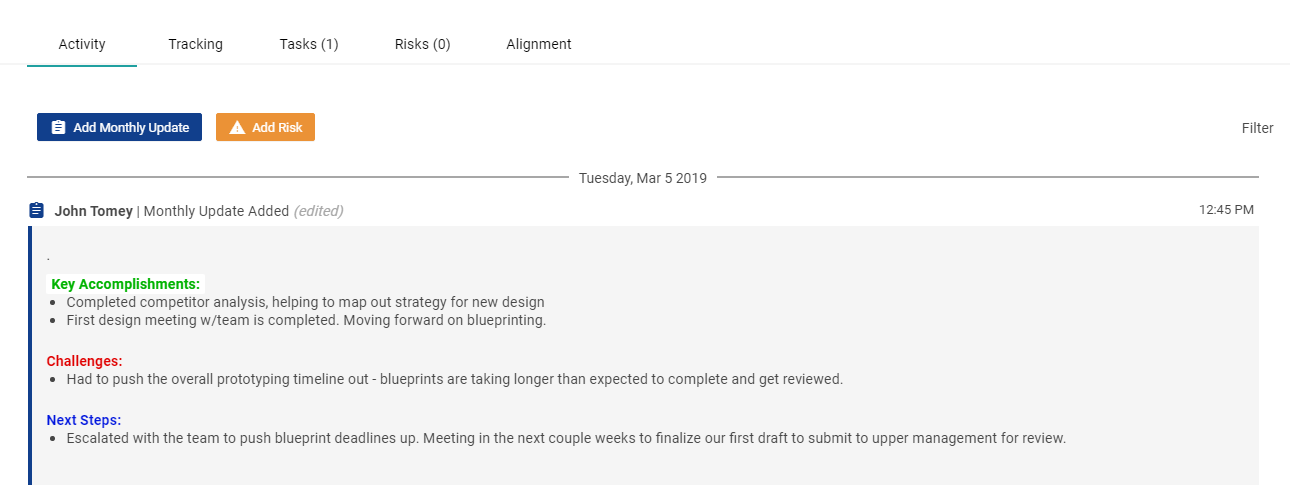
It's also useful to apply Filters in this section to focus in on specific kinds of updates.

BONUS: Customize Update Forms
This topic won't be covered in depth in this article, but note that only users with Strategy permission (strategy admins) can customize how updates look. For information on how to customize what your Update buttons and forms can look like in Cascade, see this article about Update Templates in the Strategy Model.
